Œآگl“I‚بƒeƒXƒgپF
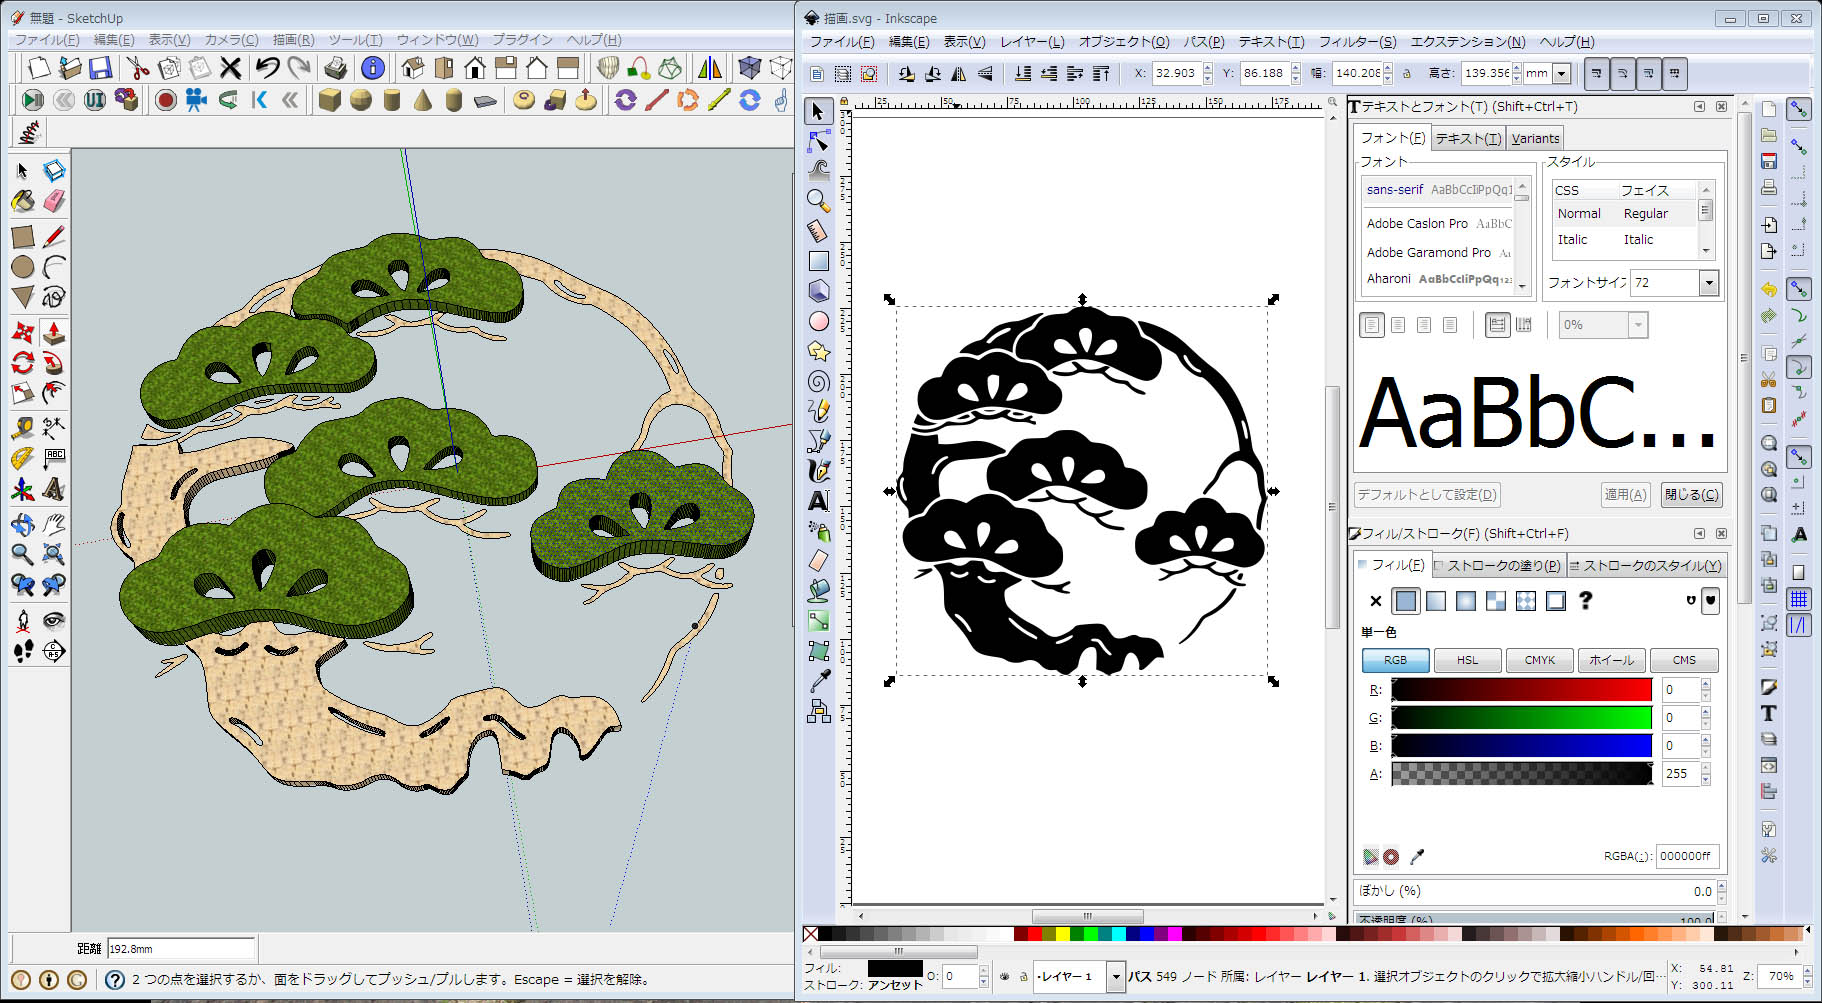
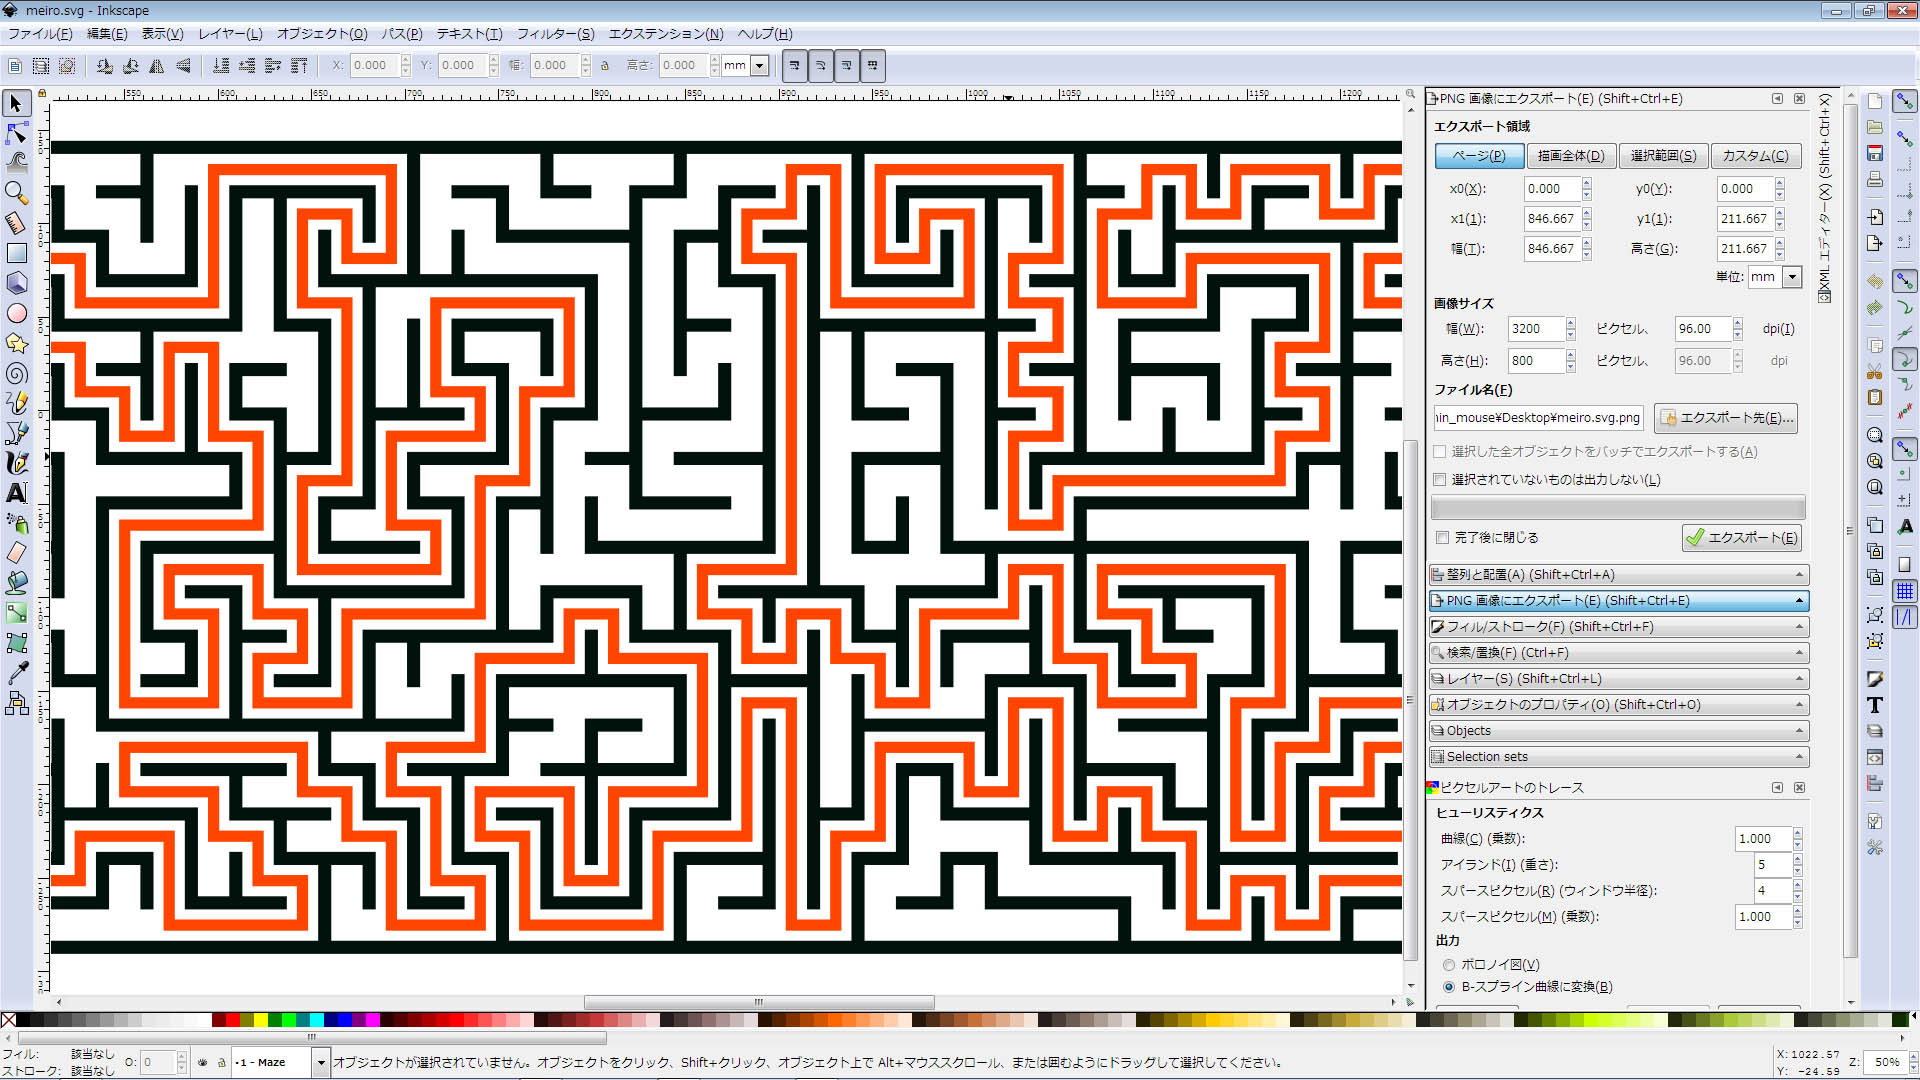
Inkscape‚ج–ہکHƒvƒ‰ƒOƒCƒ“گ®”ُ’†پBپ@Inkscape0.92.3 “®‚¢‚½پB
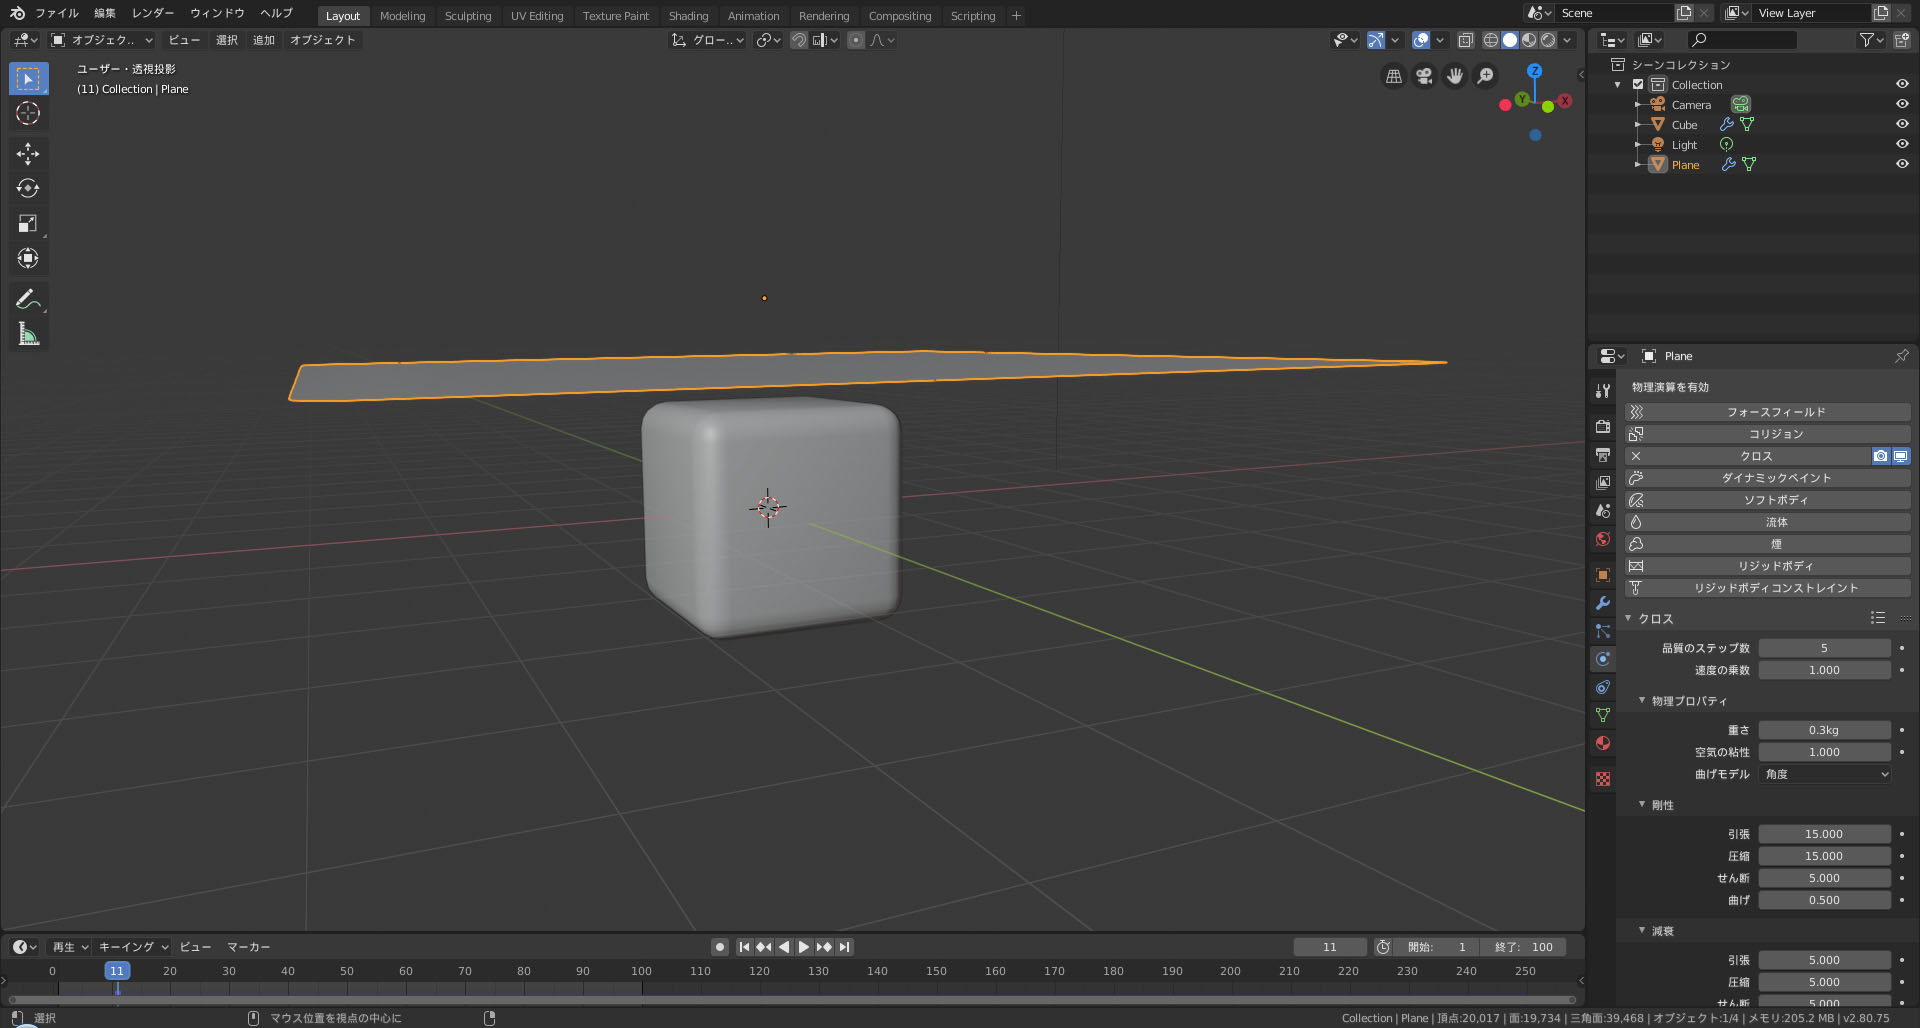
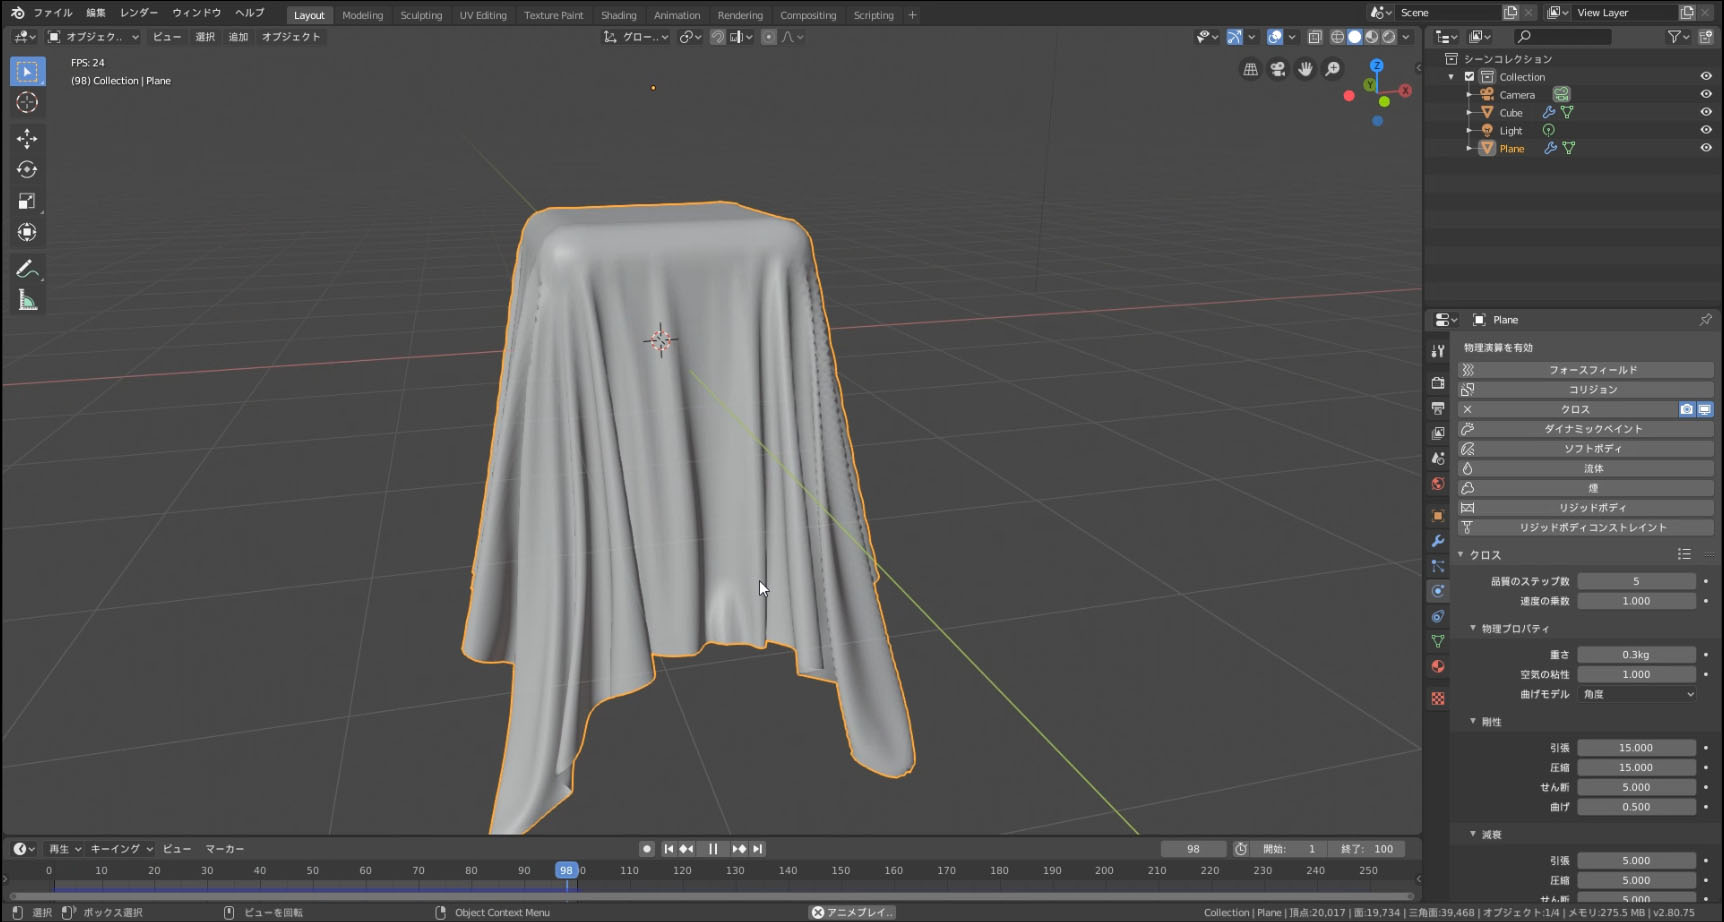
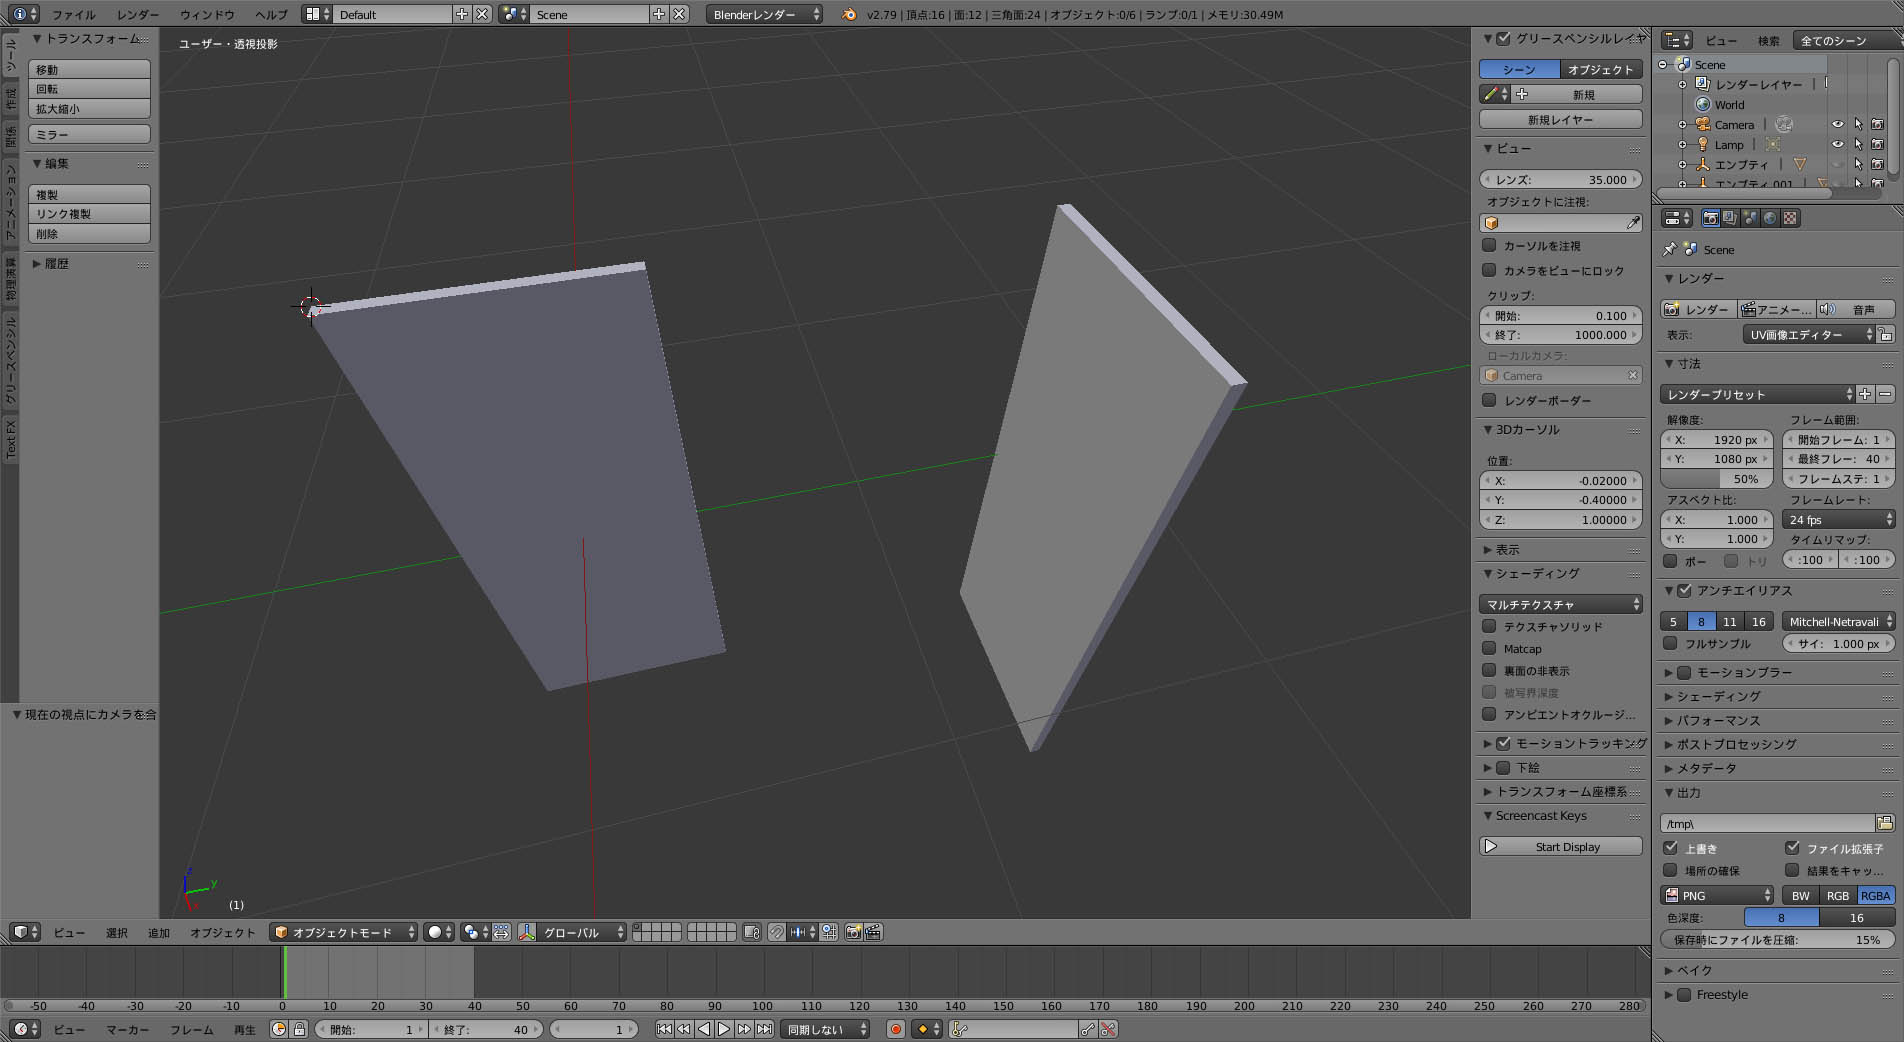
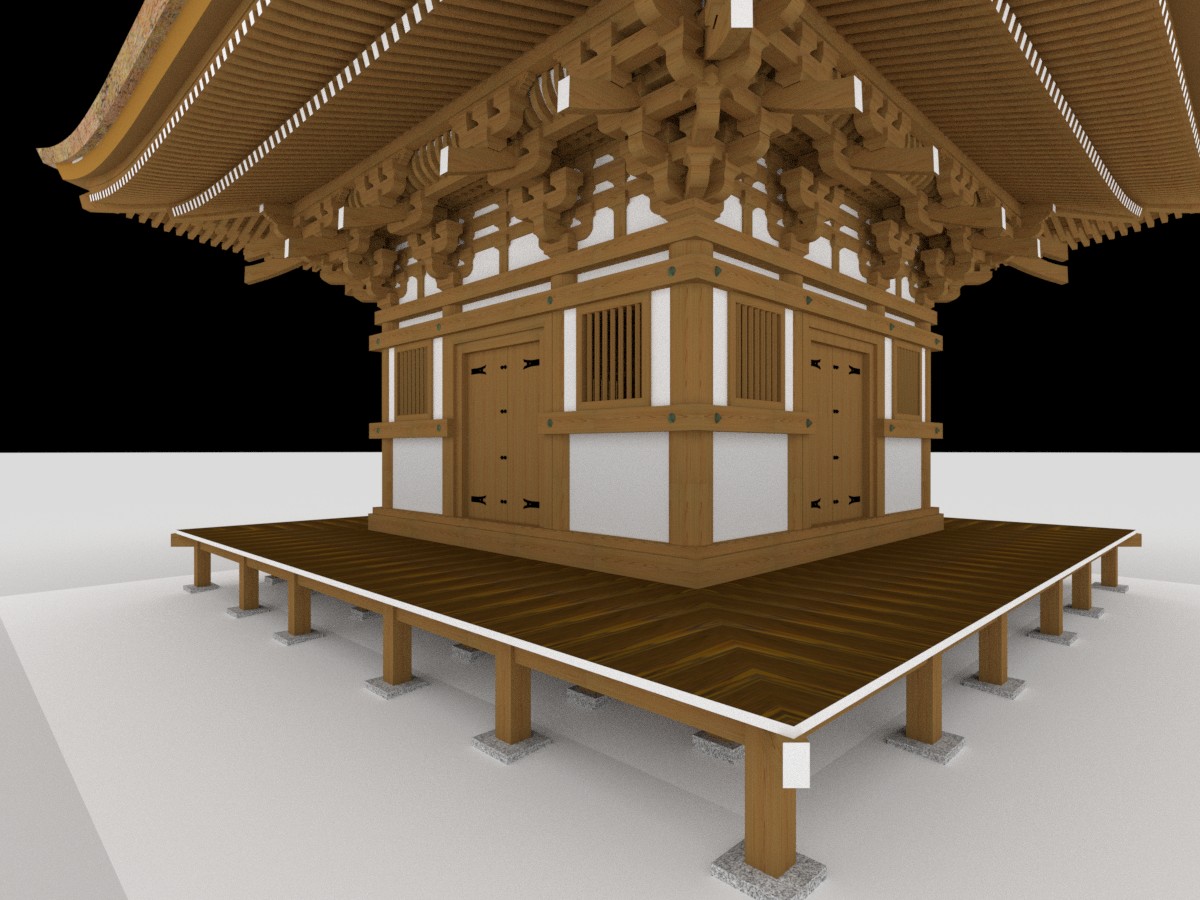
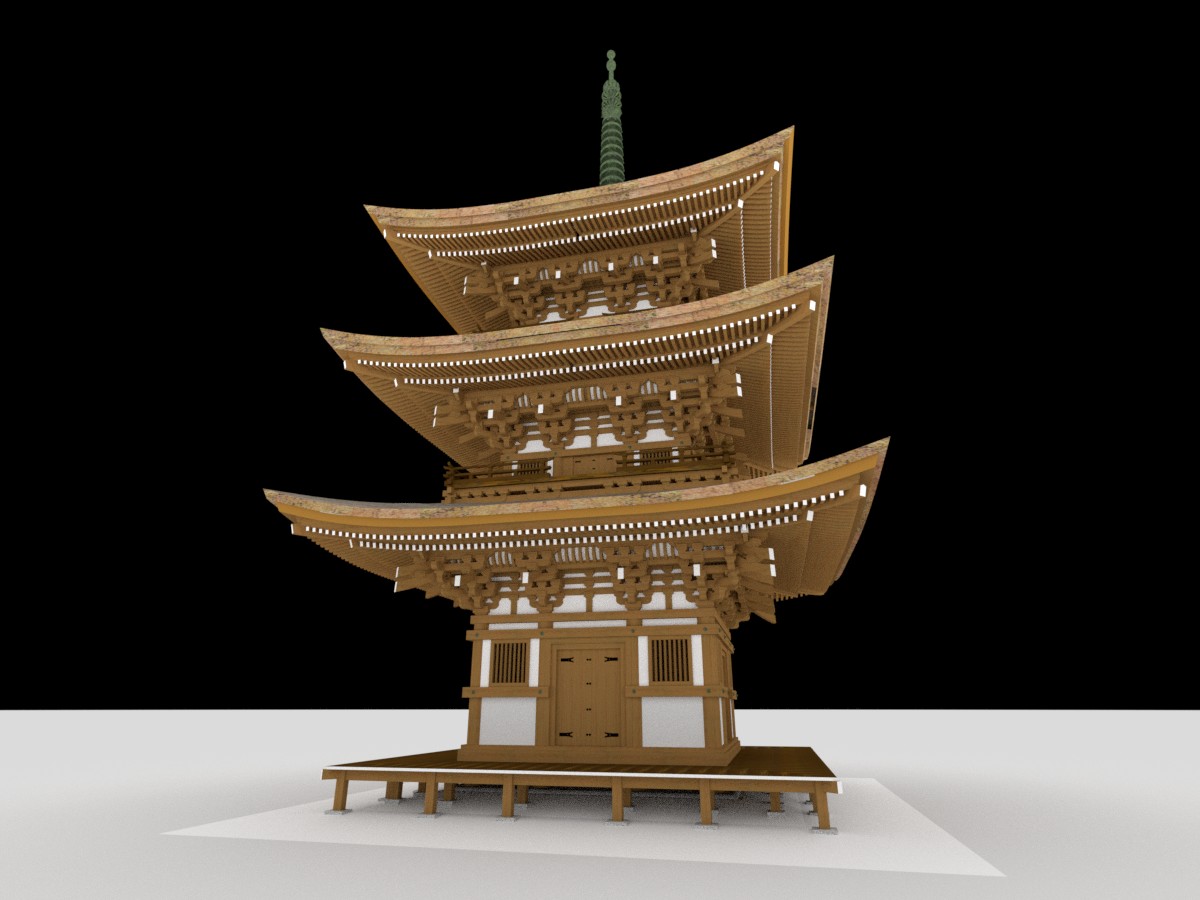
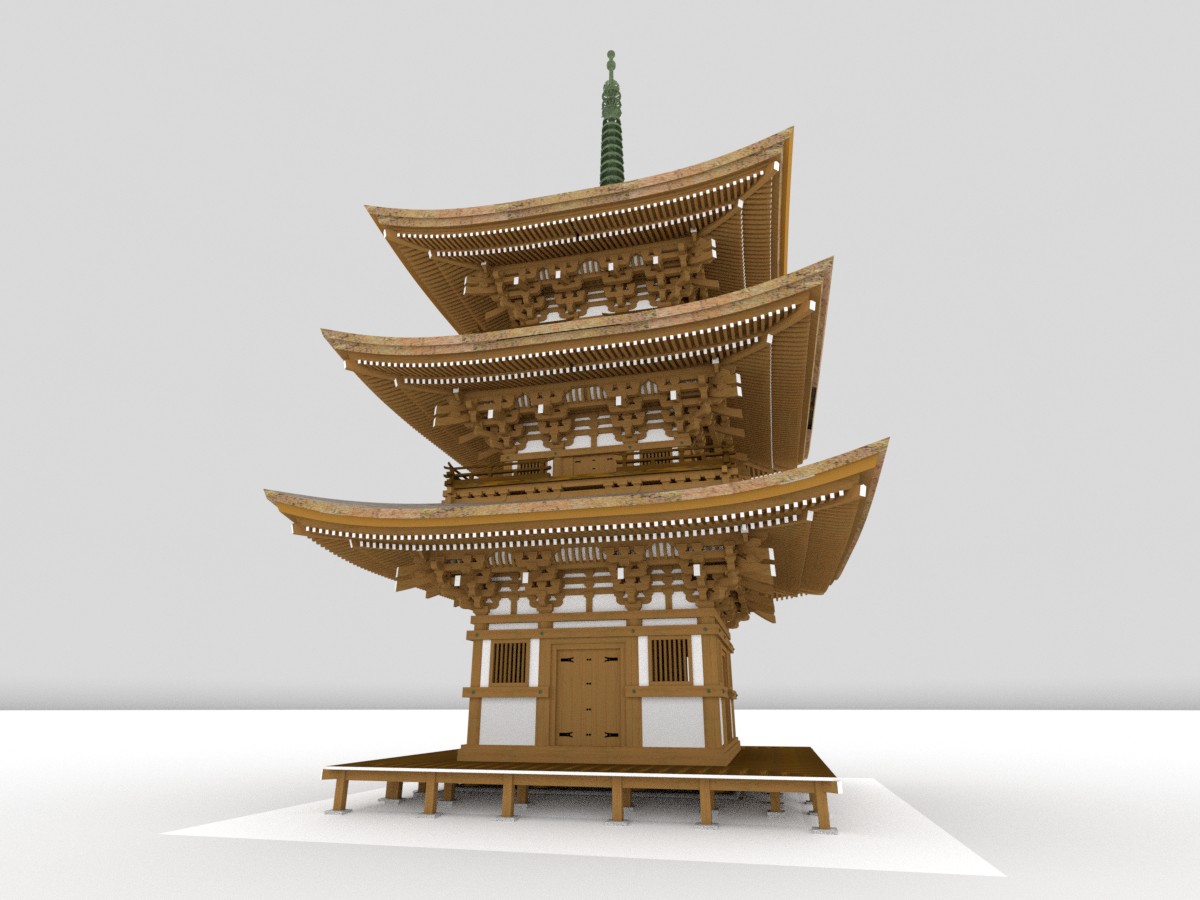
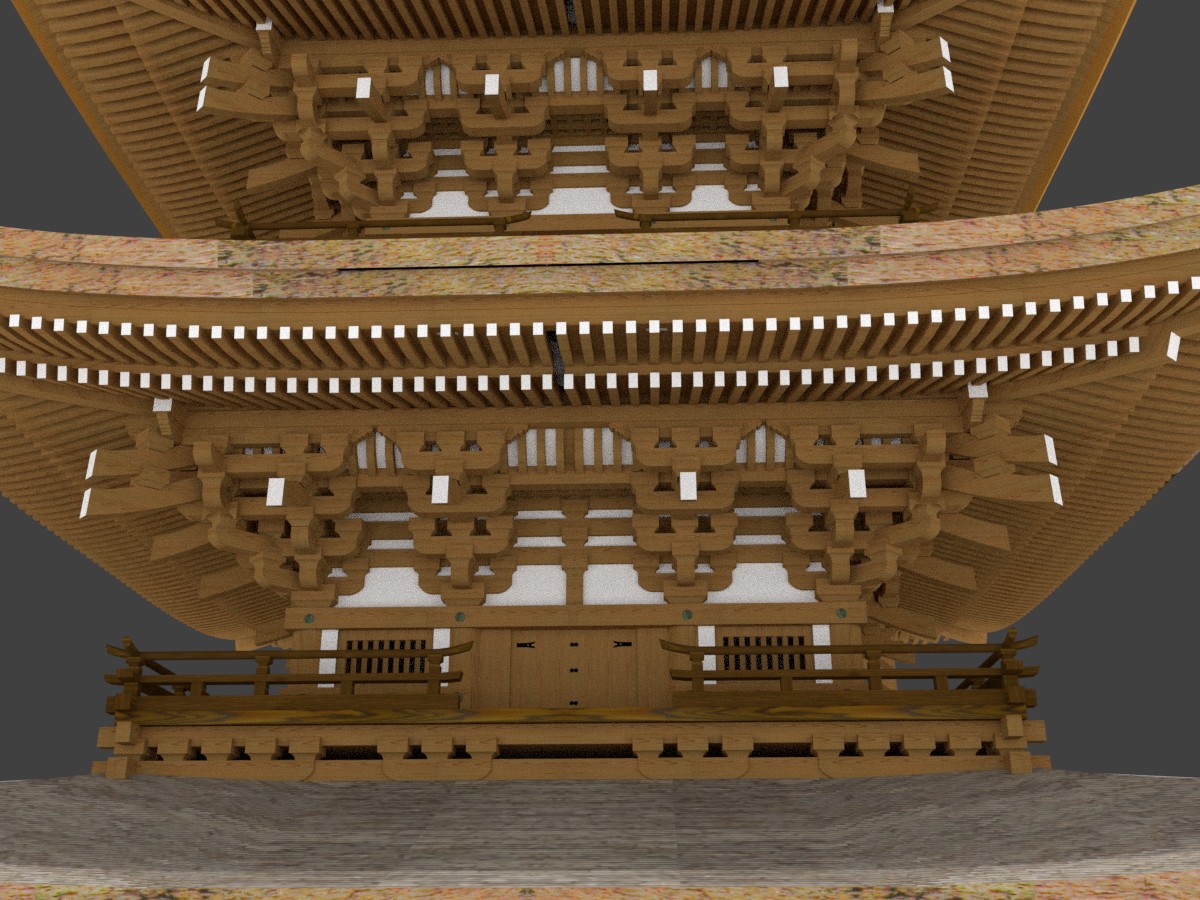
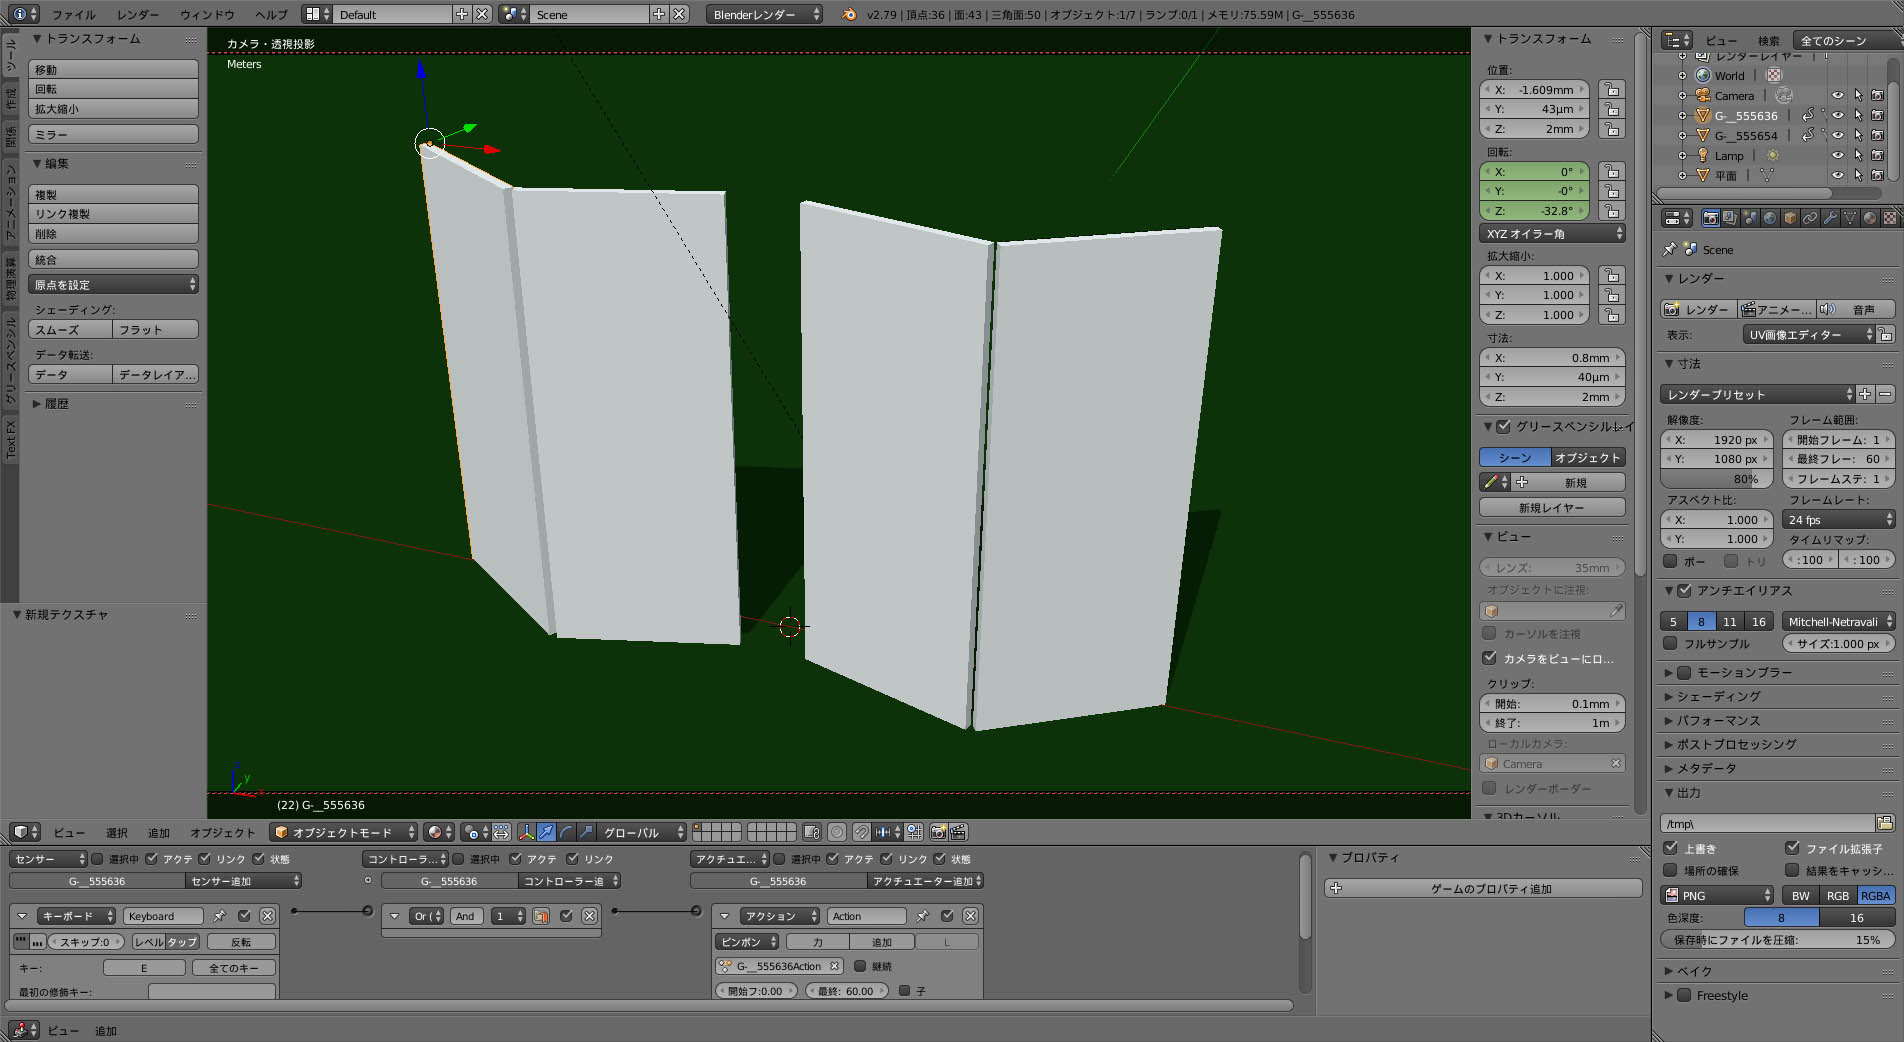
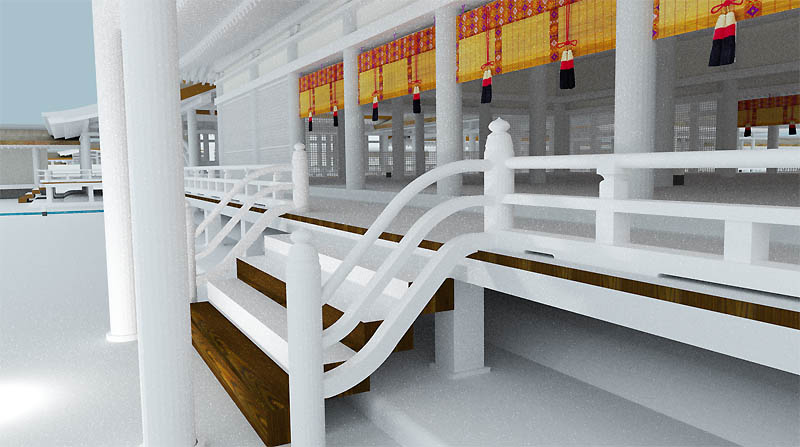
Inkscape‚©‚çBlender‚ةˆع‚µ‚ؤ—§‘ج‰»
‚؟‚ب‚ف‚ةڈم‚جƒpƒ^پ[ƒ“‚ئ‚ح•ت•¨پBپi‚±‚؟‚ç‚حچإڈ‰‚جƒeƒXƒgپj
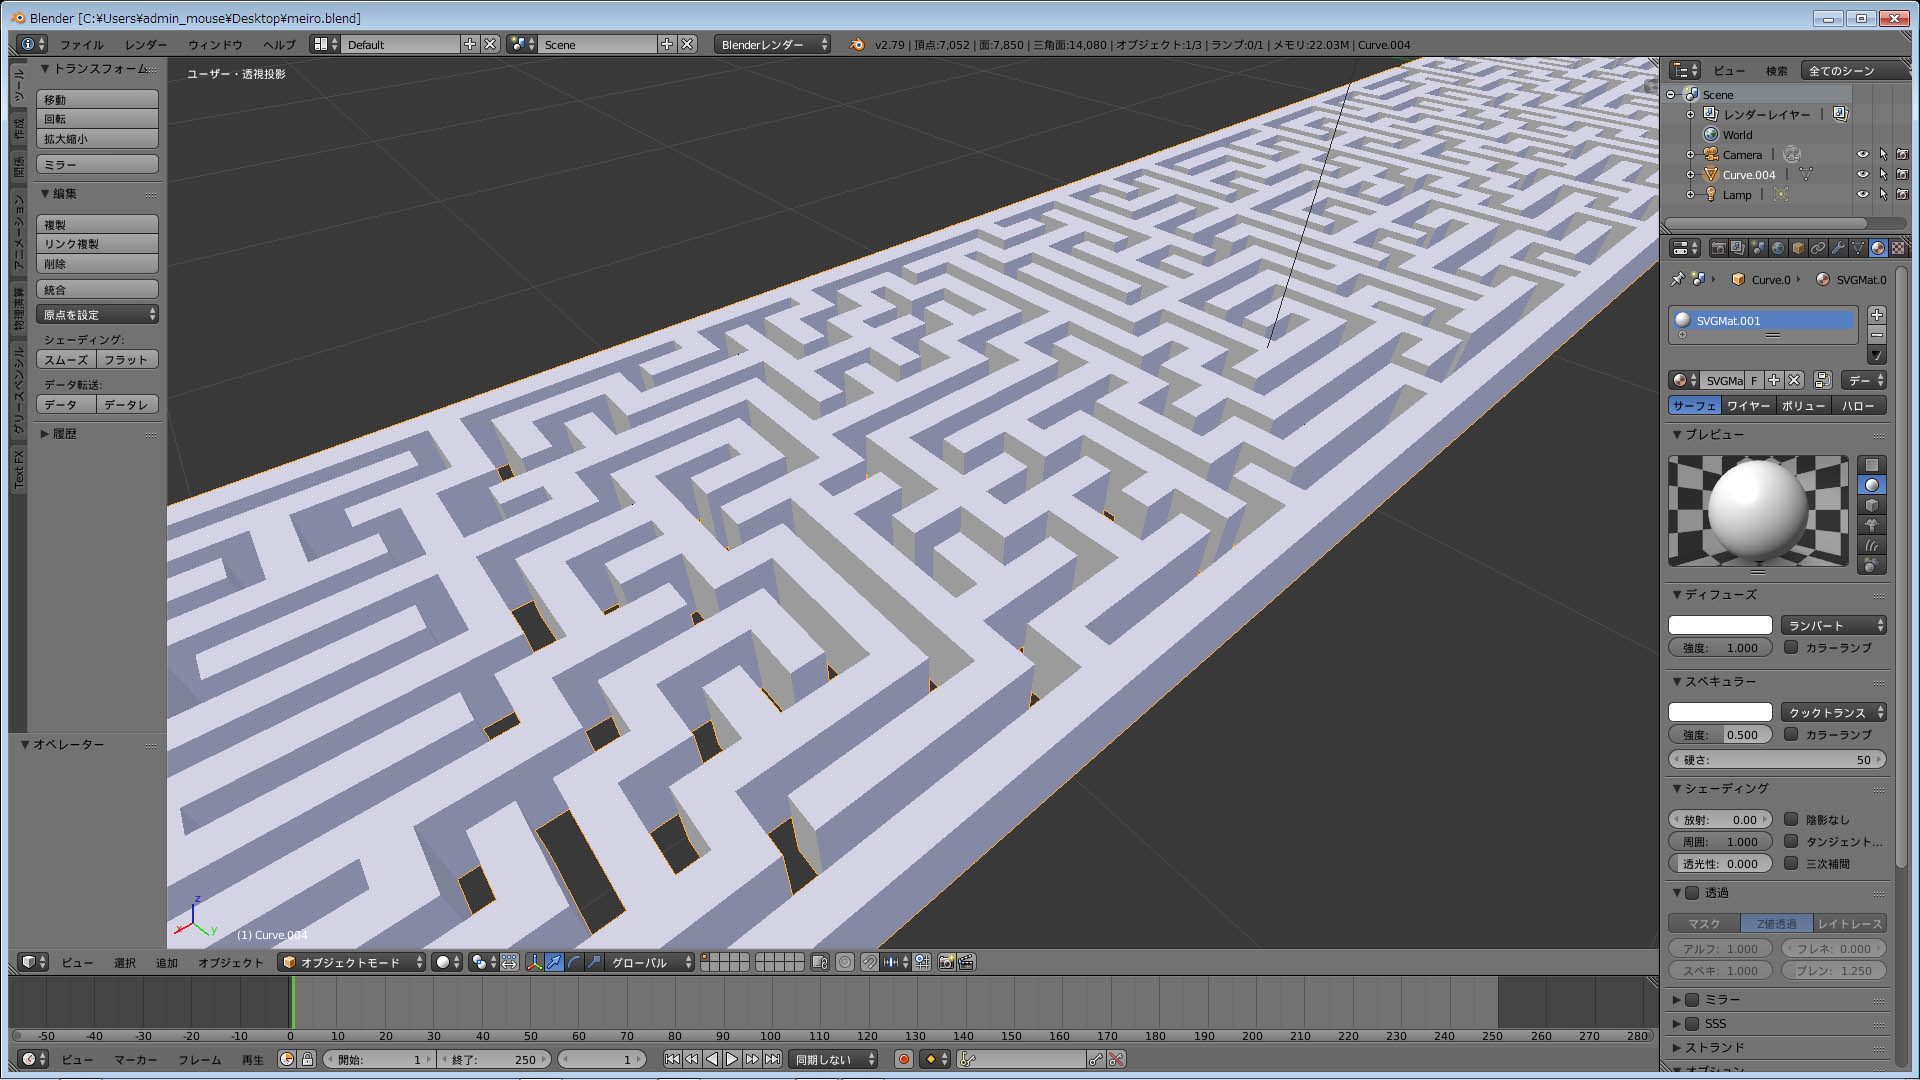
‰،’·‚ب‚ج‚ح‰~“›‚إ’[پX‚ھ‚آ‚ب‚ھ‚é–ہکH‚ة‚ب‚ء‚ؤ‚¨‚èپA‚±‚ê‚ح•½–ت“WٹJ‚µ‚½‚à‚جپB
ƒeƒXƒg‚ب‚ج‚إپEپEپB
PythonپE–ہکHƒ\پ[ƒX
#!/usr/bin/env python
# Draw a cylindrical maze suitable for plotting with the Eggbot
# The maze itself is generated using a depth first search (DFS)
# Written by Daniel C. Newman for the Eggbot Project
# Improvements and suggestions by W. Craig Trader
# 20 September 2010
# Update 26 April 2011 by Daniel C. Newman
#
# 1. Address Issue #40
# The extension now draws the maze by columns, going down
# one column of cells and then up the next column. By using
# this technique, the impact of slippage is largely limited
# the the West and East ends of the maze not meeting. Otherwise,
# the maze will still look quite well aligned both locally and
# globally. Only very gross slippage will impact the local
# appearance of the maze.
#
# Note that this new drawing technique is nearly as fast as
# the prior method. The prior method has been preserved and
# can be selected by setting self.hpp = True. ("hpp" intended
# to mean "high plotting precision".)
#
# 2. Changed the page dimensions to use a height of 800 rather
# than 1000 pixels.
#
# 3. When drawing the solution layer, draw the ending cell last.
# Previously, the starting and ending cells were first drawn,
# and then the solution path itself. That caused the pen to
# move to the beginning, the end, and then back to the beginning
# again to start the solution path. Alternatively, the solution
# path might have been drawn from the end to the start. However,
# just drawing the ending cell last was easier code-wise.
#
# This program is free software; you can redistribute it and/or modify
# it under the terms of the GNU General Public License as published by
# the Free Software Foundation; either version 2 of the License, or
# (at your option) any later version.
#
# This program is distributed in the hope that it will be useful,
# but WITHOUT ANY WARRANTY; without even the implied warranty of
# MERCHANTABILITY or FITNESS FOR A PARTICULAR PURPOSE. See the
# GNU General Public License for more details.
#
# You should have received a copy of the GNU General Public License
# along with this program; if not, write to the Free Software
# Foundation, Inc., 59 Temple Place, Suite 330, Boston, MA 02111-1307 USA
import sys
import array
import random
import math
import inkex
import simplestyle
# Initialize the psuedo random number generator
random.seed()
PLOT_WIDTH = int( 3200 ) # Eggbot plot width in pixels
PLOT_HEIGHT = int( 800 ) # Eggbot plot height in pixels
TARGET_WIDTH = int( 3200 ) # Desired plot width in pixels
TARGET_HEIGHT = int( 600 ) # Desired plot height in pixels
# Add a SVG path element to the document
# We could do this just as easily as a polyline
def draw_SVG_path( pts, c, t, parent ):
if ( pts is None ) or len( pts ) == 0: # Nothing to draw
return
if isinstance( pts, list ):
assert len( pts ) % 3 == 0, "len(pts) must be a multiple of three"
d = "%s %d,%d" % ( pts[0], pts[1], pts[2] )
for i in range( 3, len( pts ), 3 ):
d += " %s %d,%d" % ( pts[i], pts[i+1], pts[i+2] )
elif isinstance( pts, str ):
d = pts
else:
return
style = { 'stroke':c, 'stroke-width':str( t ), 'fill':'none' }
line_attribs = { 'style':simplestyle.formatStyle( style ),'d':d }
inkex.etree.SubElement( parent, inkex.addNS( 'path','svg' ), line_attribs )
# Add a SVG rect element to the document
def draw_SVG_rect( x, y, w, h, c, t, fill, parent ):
style = { 'stroke':c, 'stroke-width':str( t ), 'fill':fill }
rect_attribs = { 'style':simplestyle.formatStyle( style ),
'x':str( x ), 'y':str( y ),
'width':str( w ), 'height':str( h ) }
inkex.etree.SubElement( parent, inkex.addNS( 'rect', 'svg' ),
rect_attribs )
class Maze( inkex.Effect ):
# Each cell in the maze is represented using 9 bits:
#
# Visited -- When set, indicates that this cell has been visited during
# construction of the maze
#
# Border -- Four bits indicating which if any of this cell's walls are
# part of the maze's boundary (i.e., are unremovable walls)
#
# Walls -- Four bits indicating which if any of this cell's walls are
# still standing
#
# Visited Border Walls
# x x x x x x x x x
# W S E N W S E N
_VISITED = 0x0100
_NORTH = 0x0001
_EAST = 0x0002
_SOUTH = 0x0004
_WEST = 0x0008
def __init__( self ):
inkex.Effect.__init__( self )
self.OptionParser.add_option(
"--tab", action="store", type="string",
dest="tab", default="controls",
help="The active tab when Apply was pressed" )
self.OptionParser.add_option(
"--mazeSize", action="store", type="string", dest="mazeSize",
default="MEDIUM", help="Difficulty of maze to build" )
#self.OptionParser.add_option(
# "--hpp", action="store", type="inkbool", dest="hpp", default=False,
# help="Use a faster plotting technique that requires much better plotting precision" )
#self.hpp = self.options.hpp
self.hpp = False
self.w = int( 0 )
self.h = int( 0 )
self.solved = int( 0 )
self.start_x = int( 0 )
self.start_y = int( 0 )
self.finish_x = int( 0 )
self.finish_y = int( 0 )
self.solution_x = None
self.solution_y = None
self.cells = None
# Drawing information
self.scale = float( 25.0 )
self.last_point = None
self.path = ''
def effect( self ):
# These dimensions are chosen so as to maintain integral dimensions
# with a ratio of width to height of TARGET_WIDTH to TARGET_HEIGHT.
# Presently that's 3200 to 600 which leads to a ratio of 5 and 1/3.
if self.options.mazeSize == 'SMALL':
self.w = int( 32 )
self.h = int( 6 )
elif self.options.mazeSize == 'MEDIUM':
self.w = int( 64 )
self.h = int( 12 )
elif self.options.mazeSize == 'LARGE':
self.w = int( 96 )
self.h = int( 18 )
else:
self.w = int( 128 )
self.h = int( 24 )
# The large mazes tend to hit the recursion limit
limit = sys.getrecursionlimit()
if limit < ( 4 + self.w * self.h ):
sys.setrecursionlimit( 4 + self.w * self.h )
maze_size = self.w * self.h
self.finish_x = int( self.w - 1 )
self.finish_y = int( self.h - 1 )
self.solution_x = array.array( 'i', range( 0, maze_size ) )
self.solution_y = array.array( 'i', range( 0, maze_size ) )
self.cells = array.array( 'H', range( 0, maze_size ) )
# Remove any old maze
for node in self.document.xpath( '//svg:g[@inkscape:label="1 - Maze"]', namespaces=inkex.NSS ):
parent = node.getparent()
parent.remove( node )
# Remove any old solution
for node in self.document.xpath( '//svg:g[@inkscape:label="2 - Solution"]', namespaces=inkex.NSS ):
parent = node.getparent()
parent.remove( node )
# Remove any empty, default "Layer 1"
for node in self.document.xpath( '//svg:g[@id="layer1"]', namespaces=inkex.NSS ):
if not node.getchildren():
parent = node.getparent()
parent.remove( node )
# Start a new maze
self.solved = 0
self.start_x = random.randint( 0, self.w - 1 )
self.finish_x = random.randint( 0, self.w - 1 )
# Initialize every cell with all four walls up
for i in range( 0, maze_size ):
self.cells[i] = Maze._NORTH | Maze._EAST | Maze._SOUTH | Maze._WEST
# Now set our borders -- borders being walls which cannot be removed.
# Since we are a maze on the surface of a cylinder we only have two
# edges and hence only two borders. We consider our two edges to run
# from WEST to EAST and to be at the NORTH and SOUTH.
z = ( self.h - 1 ) * self.w
for x in range( 0, self.w ):
self.cells[x] |= Maze._NORTH << 4
self.cells[x + z] |= Maze._SOUTH << 4
# Build the maze
self.handle_cell( 0, self.start_x, self.start_y )
# Now that the maze has been built, remove the appropriate walls
# associated with the start and finish points of the maze
# Note: we have to remove these after building the maze. If we
# remove them first, then the lack of a border at the start (or
# finish) cell will allow the handle_cell() routine to wander
# outside of the maze. I.e., handle_cell() doesn't do boundary
# checking on the cell cell coordinates it generates. Instead, it
# relies upon the presence of borders to prevent it wandering
# outside the confines of the maze.
self.remove_border( self.start_x, self.start_y, Maze._NORTH )
self.remove_wall( self.start_x, self.start_y, Maze._NORTH )
self.remove_border( self.finish_x, self.finish_y, Maze._SOUTH )
self.remove_wall( self.finish_x, self.finish_y, Maze._SOUTH )
# Now draw the maze
# The following scaling and translations scale the maze's
# (width, height) to (TARGET_WIDTH, TARGET_HEIGHT), and translates
# the maze so that it centered within a document of dimensions
# (width, height) = (PLOT_WIDTH, PLOT_HEIGHT)
# Note that each cell in the maze is drawn 2 x units wide by
# 2 y units high. A width and height of 2 was chosen for
# convenience and for allowing easy identification (as the integer 1)
# of the centerline along which to draw solution paths. It is the
# abstract units which are then mapped to the TARGET_WIDTH eggbot x
# pixels by TARGET_HEIGHT eggbot y pixels rectangle.
scale_x = float( TARGET_WIDTH ) / float( 2 * self.w )
scale_y = float( TARGET_HEIGHT ) / float( 2 * self.h )
translate_x = float( PLOT_WIDTH - TARGET_WIDTH ) / 2.0
translate_y = float( PLOT_HEIGHT - TARGET_HEIGHT ) / 2.0
# And the SVG transform is thus
t = 'translate(%f,%f)' % ( translate_x, translate_y ) + \
' scale(%f,%f)' % ( scale_x, scale_y )
# For scaling line thicknesses. We'll typically draw a line of
# thickness 1 but will need to make the SVG path have a thickness
# of 1 / scale so that after our transforms are applied, the
# resulting thickness is the 1 we wanted in the first place.
if scale_x > scale_y:
self.scale = scale_x
else:
self.scale = scale_y
self.last_point = None
self.path = ''
if not self.hpp:
# To draw the walls, we start at the left-most column of cells, draw down drawing
# the WEST and NORTH walls and then draw up drawing the EAST and SOUTH walls.
# By drawing in this back and forth fashion, we minimize the effect of slippage.
for x in range( 0, self.w, 2 ):
self.draw_vertical( x )
else:
# The drawing style of the "high plotting precision" / "faster plotting" mode
# is such that it minimizes the number of pen up / pen down operations
# but at the expense of requiring higher drawing precision. It's style
# of drawing works best when there is very minimal slippage of the egg
# Draw the horizontal walls
self.draw_horizontal_hpp( 0, Maze._NORTH )
for y in range( 0, self.h - 1 ):
self.draw_horizontal_hpp( y, Maze._SOUTH )
self.draw_horizontal_hpp( self.h - 1, Maze._SOUTH )
# Draw the vertical walls
# Since this is a maze on the surface of a cylinder, we don't need
# to draw the vertical walls at the outer edges (x = 0 & x = w - 1)
for x in range( 0, self.w ):
self.draw_vertical_hpp( x, Maze._EAST )
# Maze in layer "1 - Maze"
attribs = {
inkex.addNS( 'label', 'inkscape' ) : '1 - Maze',
inkex.addNS( 'groupmode', 'inkscape' ) : 'layer',
'transform' : t }
maze_layer = inkex.etree.SubElement( self.document.getroot(), 'g', attribs )
draw_SVG_path( self.path, "#000000", float( 1 / self.scale ), maze_layer )
# Now draw the solution in red in layer "2 - Solution"
attribs = {
inkex.addNS( 'label', 'inkscape' ) : '2 - Solution',
inkex.addNS( 'groupmode', 'inkscape' ) : 'layer',
'transform' : t }
maze_layer = inkex.etree.SubElement( self.document.getroot(), 'g', attribs )
# Mark the starting cell
draw_SVG_rect( 0.25 + 2 * self.start_x, 0.25 + 2 * self.start_y,
1.5, 1.5, "#ff0000", 0, "#ff0000", maze_layer )
# And now generate the solution path itself
# To minimize the number of plotted paths (and hence pen up / pen
# down operations), we generate as few SVG paths as possible.
# However, for aesthetic reasons we stop the path and start a new
# one when it runs off the edge of the document. We could keep on
# drawing as the eggbot will handle that just fine. However, it
# doesn't look as good in Inkscape. So, we end the path and start
# a new one which is wrapped to the other edge of the document.
pts = []
end_path = False
i = 0
while i < self.solved:
x1 = self.solution_x[i]
y1 = self.solution_y[i]
i += 1
x2 = self.solution_x[i]
y2 = self.solution_y[i]
if math.fabs( x1 - x2 ) > 1:
# We wrapped horizontally...
if x1 > x2:
x2 = x1 + 1
else:
x2 = x1 - 1
end_path = True
if i == 1:
pts.extend( [ 'M', 2 * x1 + 1, 2 * y1 + 1 ] )
pts.extend( [ 'L', 2 * x2 + 1, 2 * y2 + 1 ] )
if not end_path:
continue
x2 = self.solution_x[i]
y2 = self.solution_y[i]
pts.extend( [ 'M', 2 * x2 + 1, 2 * y2 + 1 ] )
end_path = False
# Put the solution path into the drawing
draw_SVG_path( pts, '#ff0000', float( 8 / self.scale ), maze_layer )
# Now mark the ending cell
draw_SVG_rect( 0.25 + 2*self.finish_x, 0.25 + 2 * self.finish_y,
1.5, 1.5, "#ff0000", 0, "#ff0000", maze_layer )
# Restore the recursion limit
sys.setrecursionlimit( limit )
# Set some document properties
node = self.document.getroot()
node.set( 'width', '3200' )
node.set( 'height', '800' )
# The following end up being ignored by Inkscape....
node = self.getNamedView()
node.set( 'showborder', 'false' )
node.set( inkex.addNS( 'cx', u'inkscape' ), '1600' )
node.set( inkex.addNS( 'cy', u'inkscape' ), '500' )
node.set( inkex.addNS( 'showpageshadow', u'inkscape' ), 'false' )
# Mark the cell at (x, y) as "visited"
def visit( self, x, y ):
self.cells[y * self.w + x] |= Maze._VISITED
# Return a non-zero value if the cell at (x, y) has been visited
def is_visited( self, x, y ):
if self.cells[y * self.w + x] & Maze._VISITED:
return -1
else:
return 0
# Return a non-zero value if the cell at (x, y) has a wall
# in the direction d
def is_wall( self, x, y, d ):
if self.cells[y * self.w + x] & d:
return -1
else:
return 0
# Remove the wall in the direction d from the cell at (x, y)
def remove_wall( self, x, y, d ):
self.cells[y * self.w + x] &= ~d
# Return a non-zero value if the cell at (x, y) has a border wall
# in the direction d
def is_border( self, x, y, d ):
if self.cells[y * self.w + x] & ( d << 4 ):
return -1
else:
return 0
# Remove the border in the direction d from the cell at (x, y)
def remove_border( self, x, y, d ):
self.cells[y * self.w + x] &= ~( d << 4 )
# This is the DFS algorithm which builds the maze. We start at depth 0
# at the starting cell (self.start_x, self.start_y). We then walk to a
# randomly selected neighboring cell which has not yet been visited (i.e.,
# previously walked into). Each step of the walk is a recursive descent
# in depth. The solution to the maze comes about when we walk into the
# finish cell at (self.finish_x, self.finish_y).
#
# Each recursive descent finishes when the currently visited cell has no
# unvisited neighboring cells.
#
# Since we don't revisit previously visited cells, each cell is visited
# no more than once. As it turns out, each cell is visited, but that's a
# little harder to show. Net, net, each cell is visited exactly once.
def handle_cell( self, depth, x, y ):
# Mark the current cell as visited
self.visit( x, y )
# Save this cell's location in our solution trail / backtrace
if not self.solved:
self.solution_x[depth] = x
self.solution_y[depth] = y
if ( x == self.finish_x ) and ( y == self.finish_y ):
# Maze has been solved
self.solved = depth
# Shuffle the four compass directions: this is the primary source
# of "randomness" in the generated maze. We need to visit each
# neighboring cell which has not yet been visited. If we always
# did that in the same order, then our mazes would look very regular.
# So, we shuffle the list of directions we try in order to find an
# unvisited neighbor.
# HINT: TRY COMMENTING OUT THE shuffle() BELOW AND SEE FOR YOURSELF
directions = [Maze._NORTH, Maze._SOUTH, Maze._EAST, Maze._WEST]
random.shuffle( directions )
# Now from the cell at (x, y), look to each of the four
# directions for unvisited neighboring cells
for i in range( 0, 4 ):
# If there is a border in direction[i], then don't try
# looking for a neighboring cell in that direction. We
# Use this check and borders to prevent generating invalid
# cell coordinates.
if self.is_border( x, y, directions[i] ):
continue
# Determine the cell coordinates of a neighboring cell
# NOTE: we trust the use of maze borders to prevent us
# from generating invalid cell coordinates
if directions[i] == Maze._NORTH:
nx = x
ny = y - 1
opposite_direction = Maze._SOUTH
elif directions[i] == Maze._SOUTH:
nx = x
ny = y + 1
opposite_direction = Maze._NORTH
elif directions[i] == Maze._EAST:
nx = x + 1
ny = y
opposite_direction = Maze._WEST
else:
nx = x - 1
ny = y
opposite_direction = Maze._EAST
# Wrap in the horizontal dimension
if nx < 0:
nx += self.w
elif nx >= self.w:
nx -= self.w
# See if this neighboring cell has been visited
if self.is_visited( nx, ny ):
# Neighbor has been visited already
continue
# The neighboring cell has not been visited: remove the wall in
# the current cell leading to the neighbor. And, from the
# neighbor remove its wall leading to the current cell.
self.remove_wall( x, y, directions[i] )
self.remove_wall( nx, ny, opposite_direction )
# Now recur by "moving" to this unvisited neighboring cell
self.handle_cell( depth + 1, nx, ny )
def draw_line( self, x1, y1, x2, y2 ):
if self.last_point is not None:
if ( self.last_point[0] == x1 ) and ( self.last_point[1] == y1 ):
self.path += ' L %d,%d' % ( x2, y2 )
self.last_point = [ x2, y2 ]
elif ( self.last_point[0] == x2 ) and ( self.last_point[1] == y2 ):
self.path += ' L %d,%d L %d,%d' % ( x1, y1, x2, y2 )
# self.last_point unchanged
else:
self.path += ' M %d,%d L %d,%d' % ( x1, y1, x2, y2 )
self.last_point = [ x2, y2 ]
else:
self.path = 'M %d,%d L %d,%d' % ( x1, y1, x2, y2 )
self.last_point = [ x2, y2 ]
def draw_wall( self, x, y, d, dir ):
if dir > 0:
if d == Maze._NORTH:
self.draw_line( 2*(x+1), 2*y, 2*x, 2*y )
elif d == Maze._WEST:
self.draw_line( 2*x, 2*y, 2*x, 2*(y+1) )
elif d == Maze._SOUTH:
self.draw_line( 2*(x+1), 2*(y+1), 2*x, 2*(y+1) )
else: # Mase._EAST
self.draw_line( 2*(x+1), 2*y, 2*(x+1), 2*(y+1) )
else:
if d == Maze._NORTH:
self.draw_line( 2*x, 2*y, 2*(x+1), 2*y )
elif d == Maze._WEST:
self.draw_line( 2*x, 2*(y+1), 2*x, 2*y )
elif d == Maze._SOUTH:
self.draw_line( 2*x, 2*(y+1), 2*(x+1), 2*(y+1) )
else: # Maze._EAST
self.draw_line( 2*(x+1), 2*(y+1), 2*(x+1), 2*y )
# Draw the vertical walls of the maze along the column of cells at
# horizonal positions
def draw_vertical( self, x ):
# Drawing moving downwards from north to south
if self.is_wall( x, 0, Maze._NORTH ):
self.draw_wall( x, 0, Maze._NORTH, +1 )
for y in range( 0, self.h ):
if self.is_wall( x, y, Maze._WEST ):
self.draw_wall( x, y, Maze._WEST, +1 )
if self.is_wall( x, y, Maze._SOUTH ):
self.draw_wall( x, y, Maze._SOUTH, +1 )
# Now, return drawing upwards moving from south to north
x += 1
if x >= self.w:
return
for y in range( self.h - 1, -1, -1 ):
if self.is_wall( x, y, Maze._SOUTH ):
self.draw_wall( x, y, Maze._SOUTH, -1 )
if self.is_wall( x, y, Maze._WEST ):
self.draw_wall( x, y, Maze._WEST, -1 )
if self.is_wall( x, 0, Maze._NORTH ):
self.draw_wall( x, 0, Maze._NORTH, -1 )
# Draw the horizontal walls of the maze along the row of
# cells at "height" y: "high plotting precision" version
def draw_horizontal_hpp(self, y, wall ):
# Cater to Python 2.4 and earlier
# dy = 0 if wall == Maze._NORTH else 1
if wall == Maze._NORTH:
dy = 0
else:
dy = 1
tracing = False
for x in range( 0, self.w ):
if self.is_wall( x, y, wall ):
if not tracing:
# Starting a new segment
segment = x
tracing = True
else:
if tracing:
# Reached the end of a segment
self.draw_line( 2 * segment, 2 * (y + dy),
2 * x, 2 * (y + dy) )
tracing = False
if tracing:
# Draw the last wall segment
self.draw_line( 2 * segment, 2 * (y + dy),
2 * self.w, 2 * (y + dy) )
# Draw the vertical walls of the maze along the column of cells at
# horizonal position x: "high plotting precision" version
def draw_vertical_hpp(self, x, wall ):
# Cater to Python 2.4 and earlier
# dx = 0 if wall == Maze._WEST else 1
if wall == Maze._WEST:
dx = 0
else:
dx = 1
# We alternate the direction in which we draw each vertical wall.
# First, from North to South and then from South to North. This
# reduces pen travel on the Eggbot
if x % 2 == 0: # North-South
y_start, y_finis, dy, offset = 0, self.h, 1, 0
else: # South-North
y_start, y_finis, dy, offset = self.h - 1, -1, -1, 2
tracing = False
for y in range( y_start, y_finis, dy ):
assert 0 <= y and y < self.h, "y (%d) is out of range" % y
if self.is_wall( x, y, wall ):
if not tracing:
# Starting a new segment
segment = y
tracing = True
else:
if tracing:
# Hit the end of a segment
self.draw_line( 2 * ( x + dx ), 2 * segment + offset,
2 * ( x + dx ), 2 * y + offset )
tracing = False
if tracing:
# complete the last wall segment
self.draw_line( 2 * ( x + dx ), 2 * segment + offset,
2 * ( x + dx ), 2 * y_finis + offset )
if __name__ == '__main__':
e = Maze()
e.affect()

“Y•tƒtƒ@ƒCƒ‹