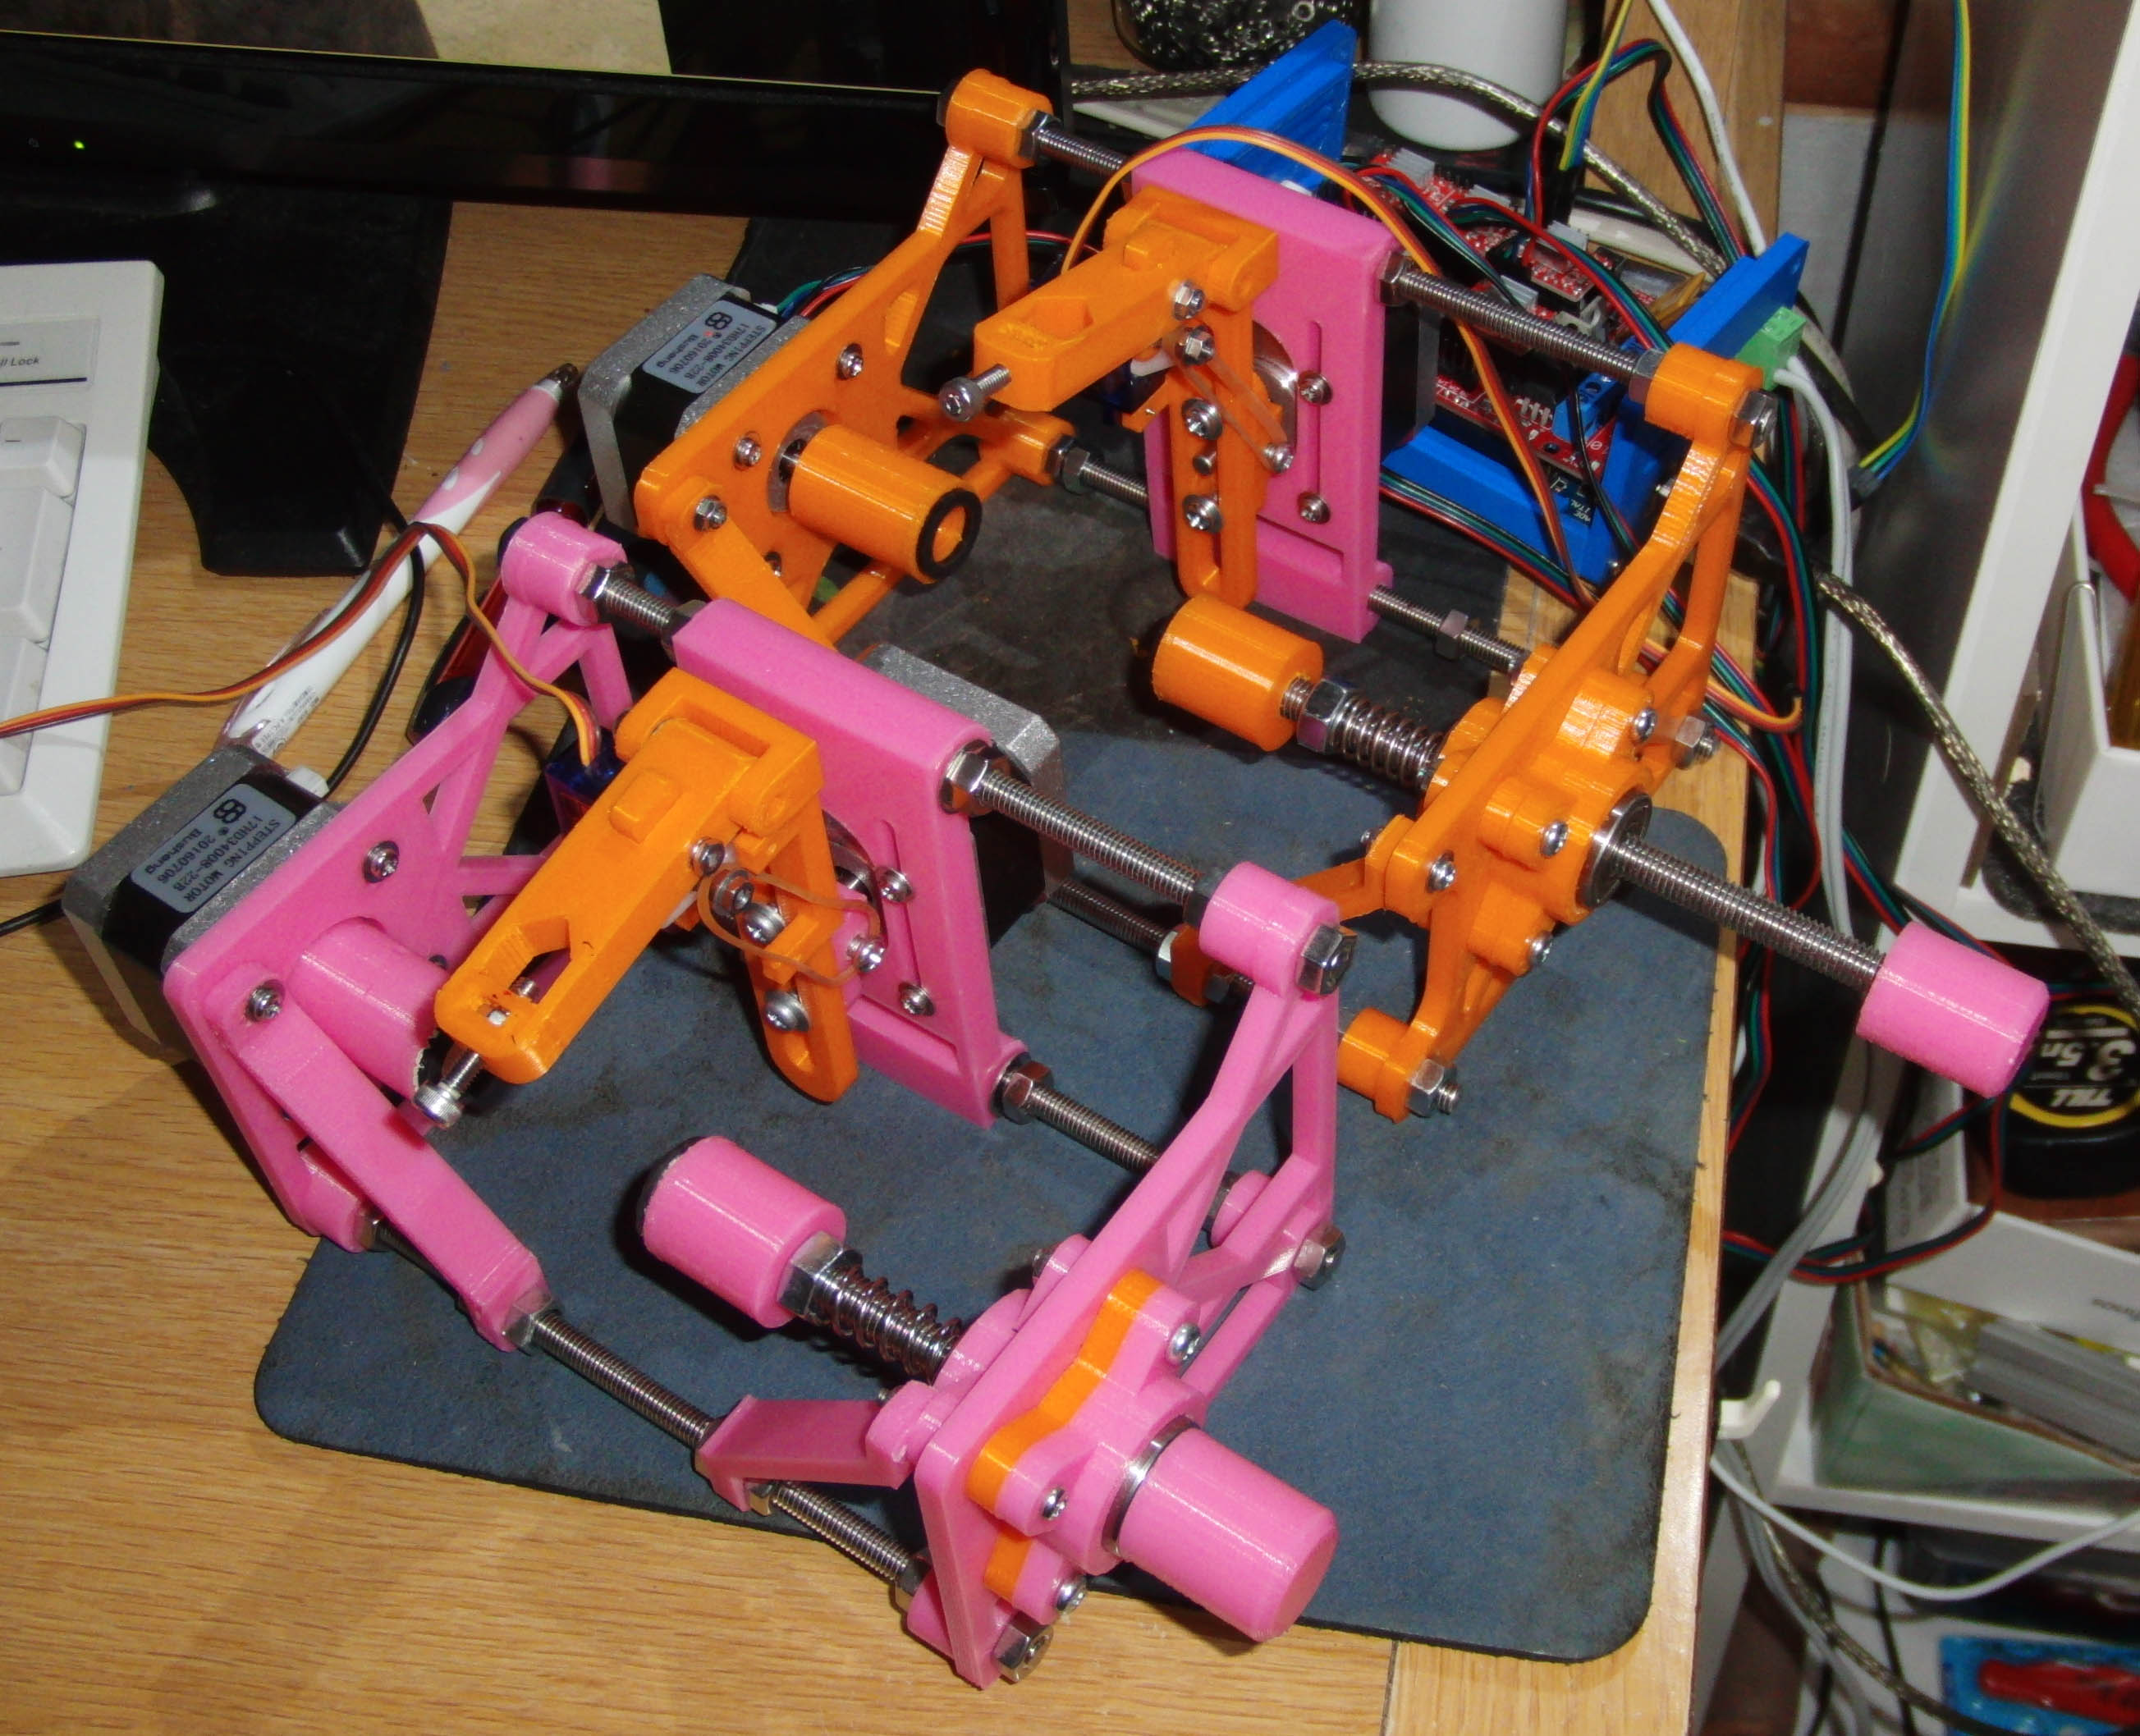
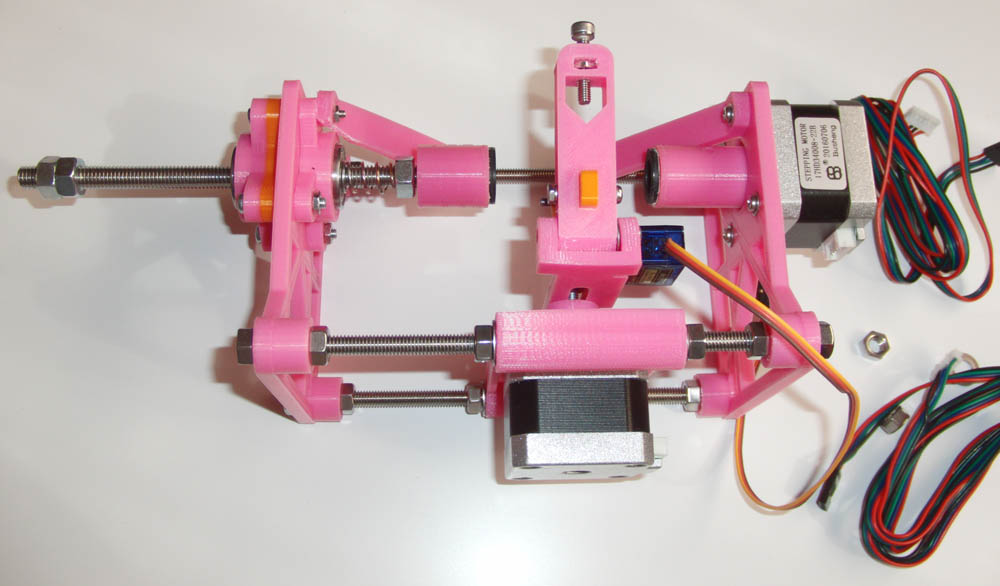
ҚЎүсҗ»ҚмӮөӮҪҒuEggbotҒvӮМ–{‘МғtғҢҒ[ғҖ
ҒiServoӮвҒAғlғW—ЮҒAҠо”ВӮИӮЗӮрҸңӮӯҒj
ғ\Ғ[ғXӮр•ПҚXӮ·ӮйҺ–ӮЙӮжӮБӮДҒuServoҒvӮрҚ¶үEӮЗӮҝӮзӮЙӮаҺжӮи•tӮҜӮзӮкӮйӮжӮӨӮЙ•ПҚXҒB
ҒuServoҒvӮрҺжӮи•tӮҜӮИӮў•Р‘ӨӮЙӮНҒAӮ»ӮМғlғWҢҠӮЙҒuғyғ“ғAҒ[ғҖҒvӮЖ’ФӮйҒA
ҺгӮўҒuҲшӮБ’ЈӮиғoғlҒvӮрҺжӮи•tӮҜӮйҒB
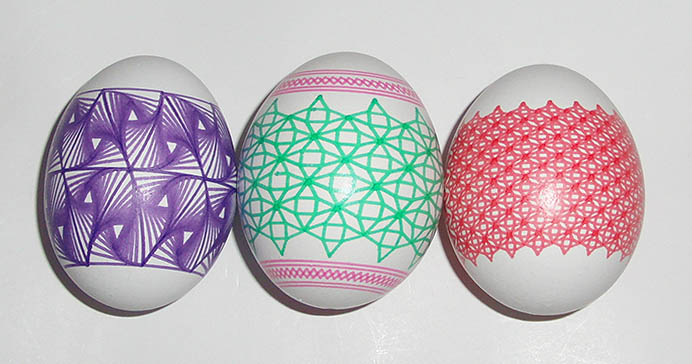
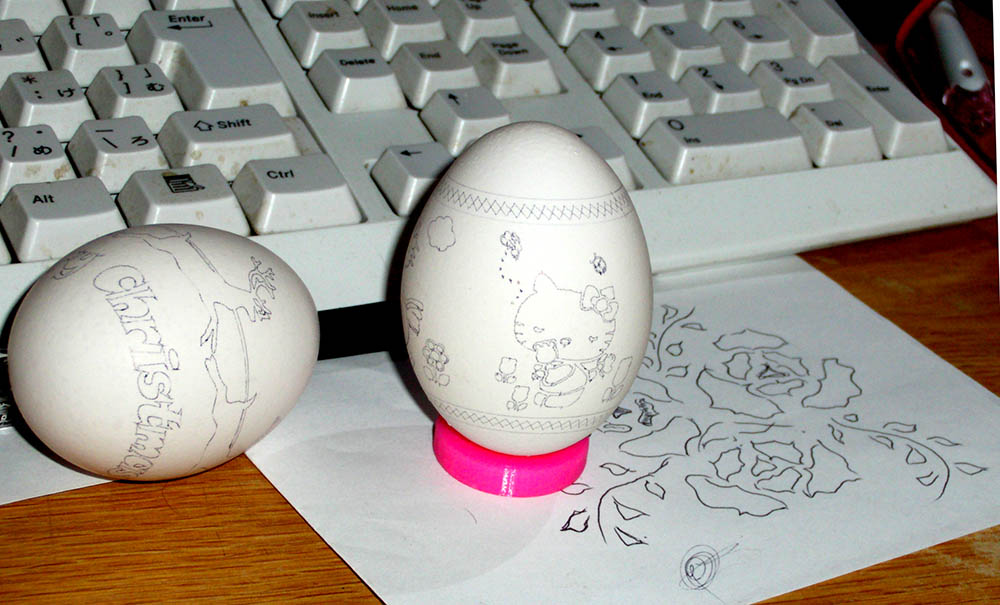
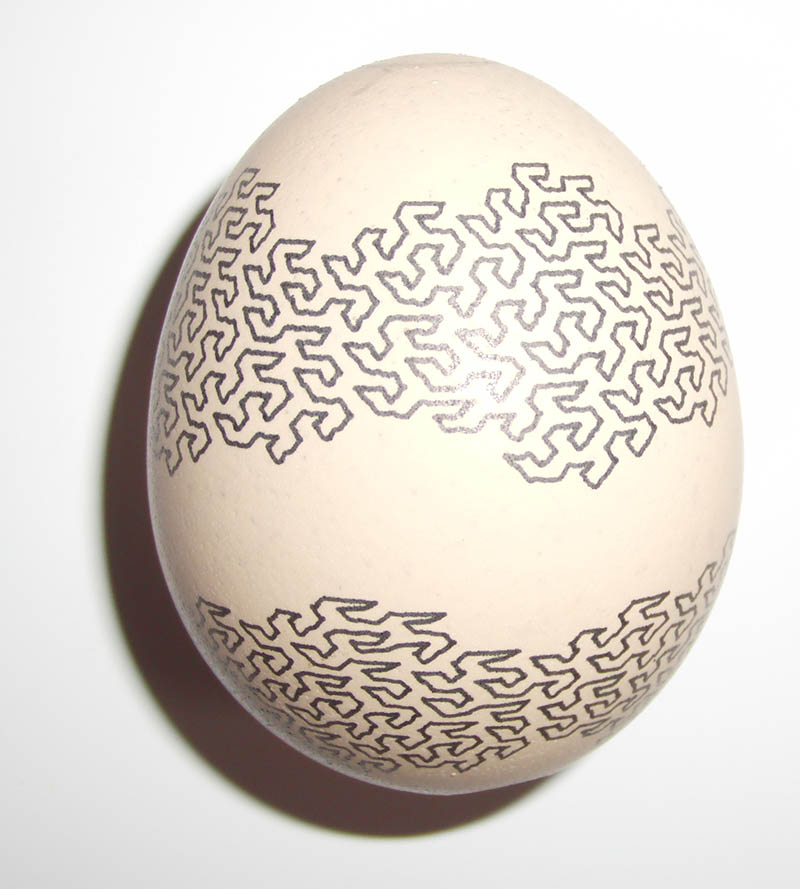
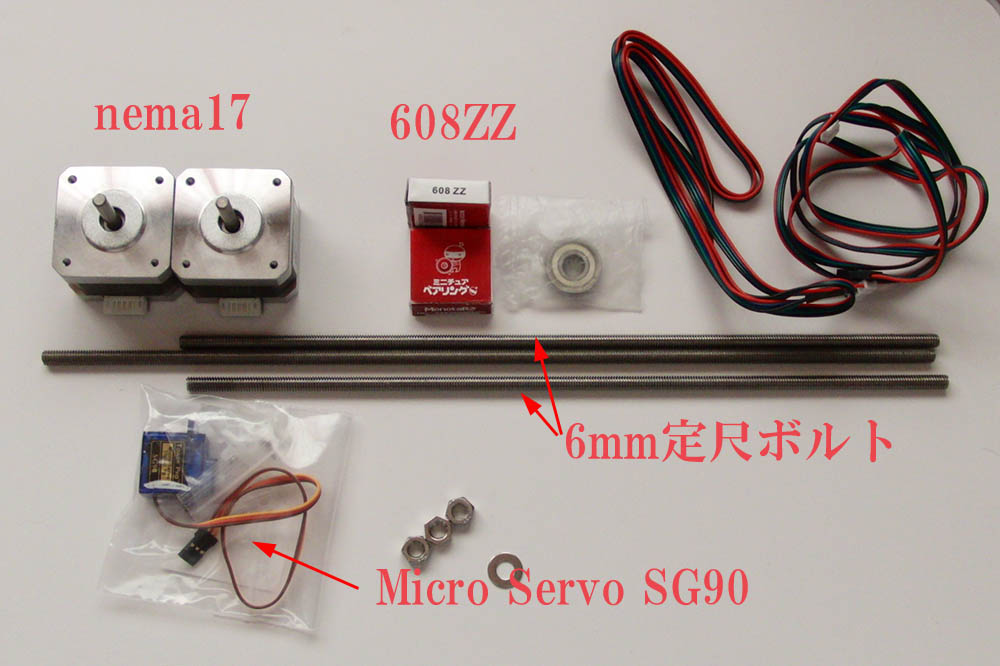
Ғi”–ӮўҠkӮМғ^ғ}ғSӮЙ0.1ғ~ғҠӮИӮЗӮМҚЧӮўғyғ“ӮЕ•`үжӮөӮҪҚЫҒAғyғ“җжӮӘҠkӮЙҗЪҗGӮөӮҪҸuҠФҒAҠkӮЙҢҠӮрҠJӮҜӮДӮөӮЬӮӨҺ–ӮӘӮ ӮБӮҪҒB
Ң»ҚЭӮНғoғlӮМ‘гӮнӮиӮЙҒAҺгӮў—НӮЕҒAҗLӮСӮМ—ЗӮў—ЦғSғҖӮр—ҳ—pӮөӮДӮўӮйҒBҒj
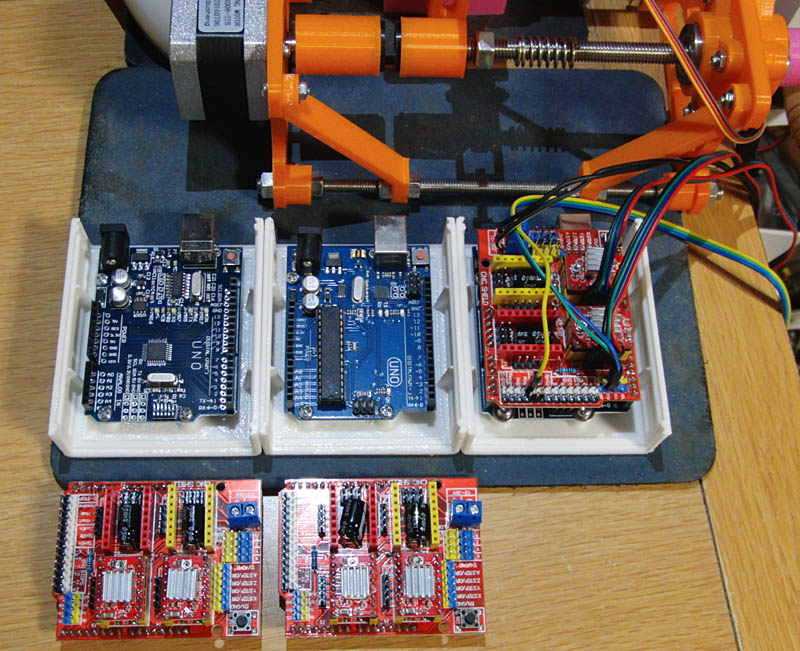
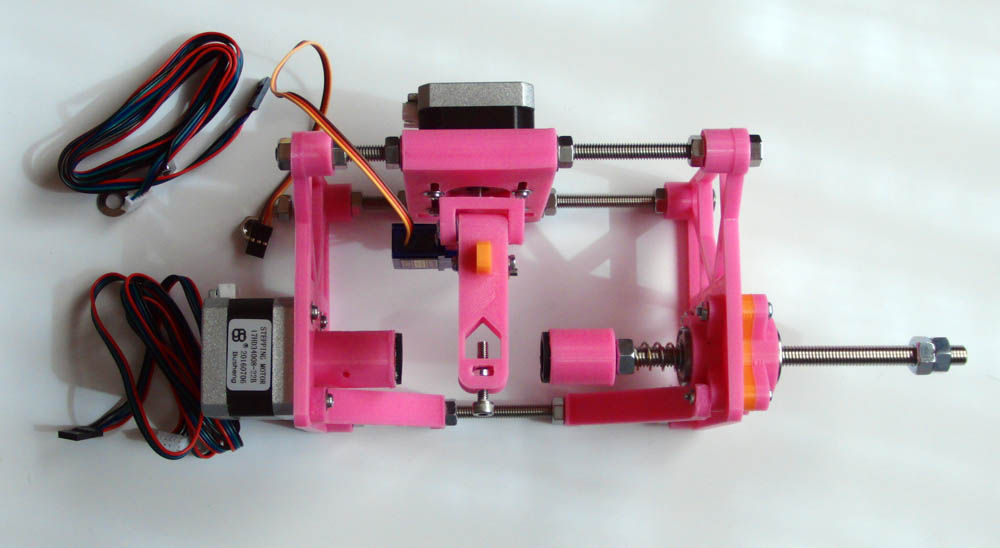
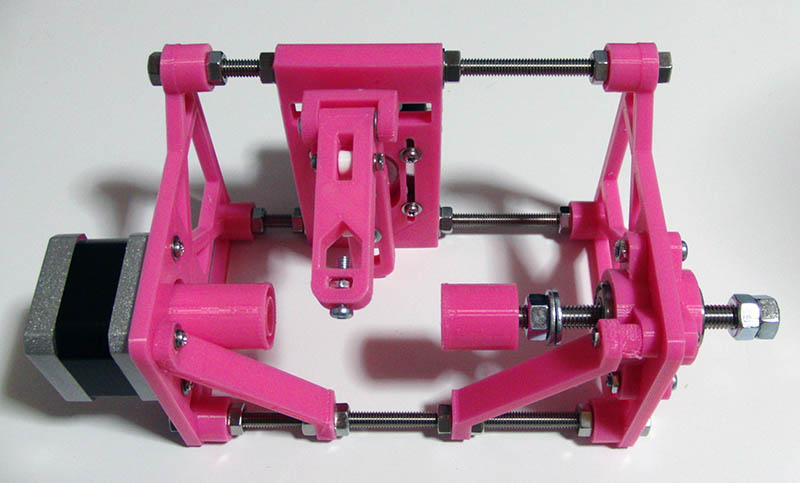
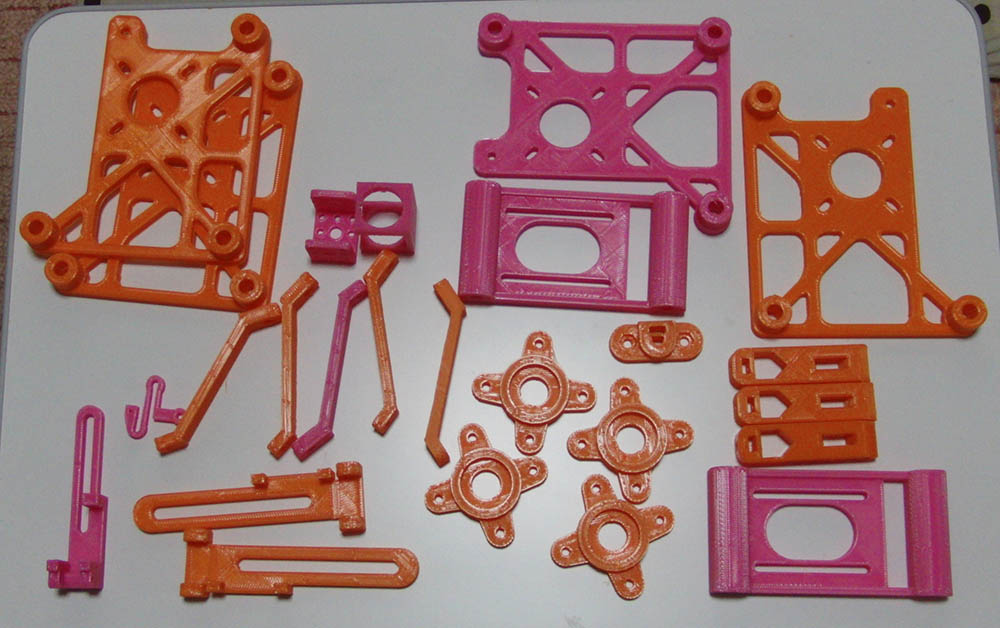
җ»ҚмӮ·ӮйҚЫӮНҒA3DғvғҠғ“ғ^Ғ[ӮЕҲуҚьӮЕӮ«ӮйӮжӮӨӮЙҠeғpҒ[ғcӮрҒustlҒvҢ`Һ®ӮЕғGғNғXғ|Ғ[ғgӮ·Ӯй•K—vӮӘӮ ӮйҒB
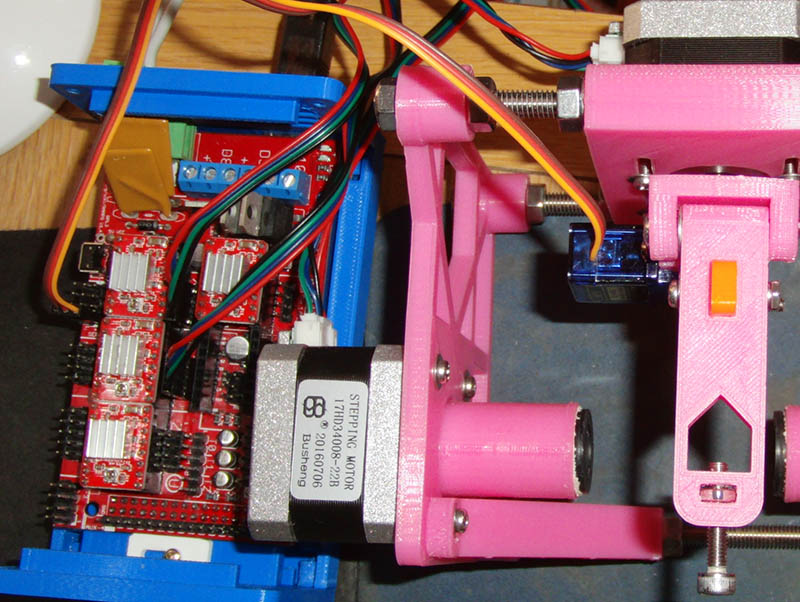
ғtғҢҒ[ғҖ–{‘МӮрҚҮ”ВӮЕҚмӮйҸкҚҮҒAҺжӮи•tӮҜҲК’uӮМҗcӮрҗіҠmӮЙҚҮӮнӮ·•K—vӮӘӮ ӮйӮӘҒAӮ»ӮкӮЩӮЗ“пӮөӮўүБҚH•”•ӘӮН–іӮўҒB
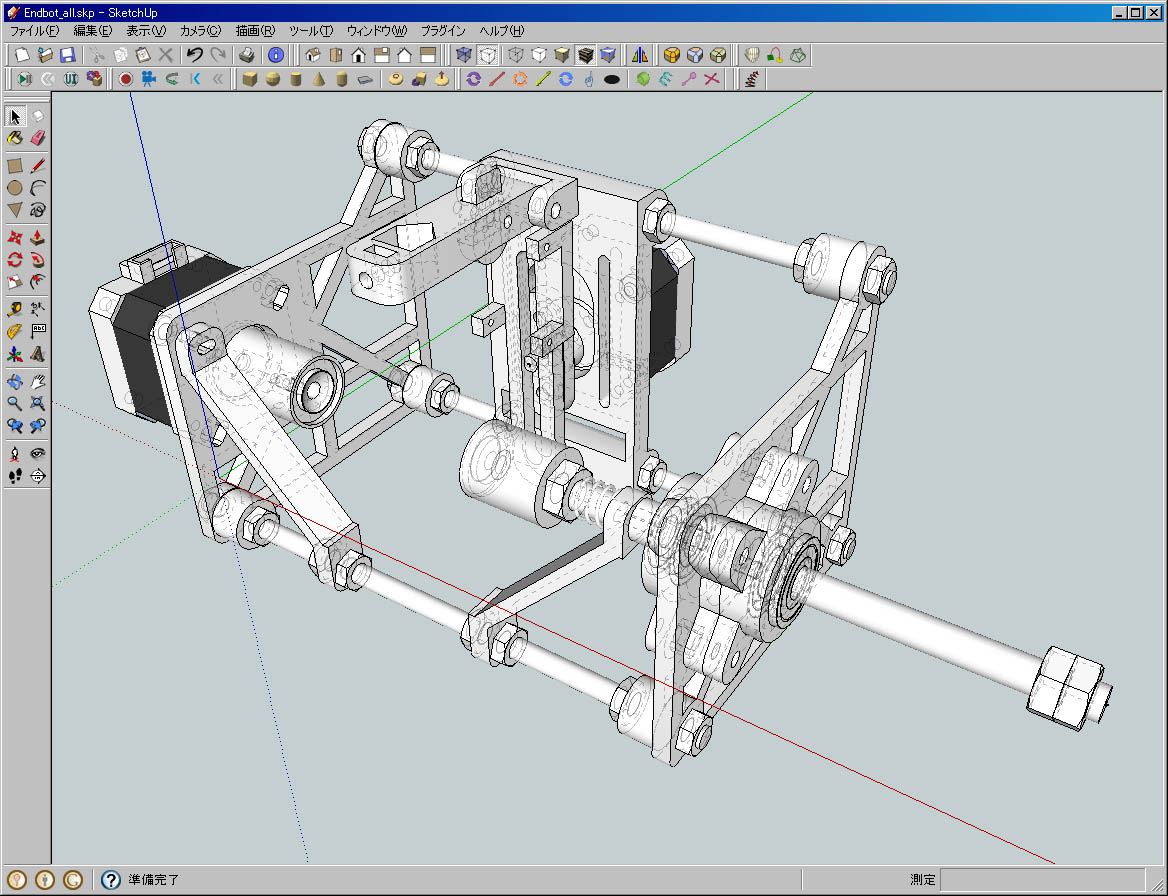
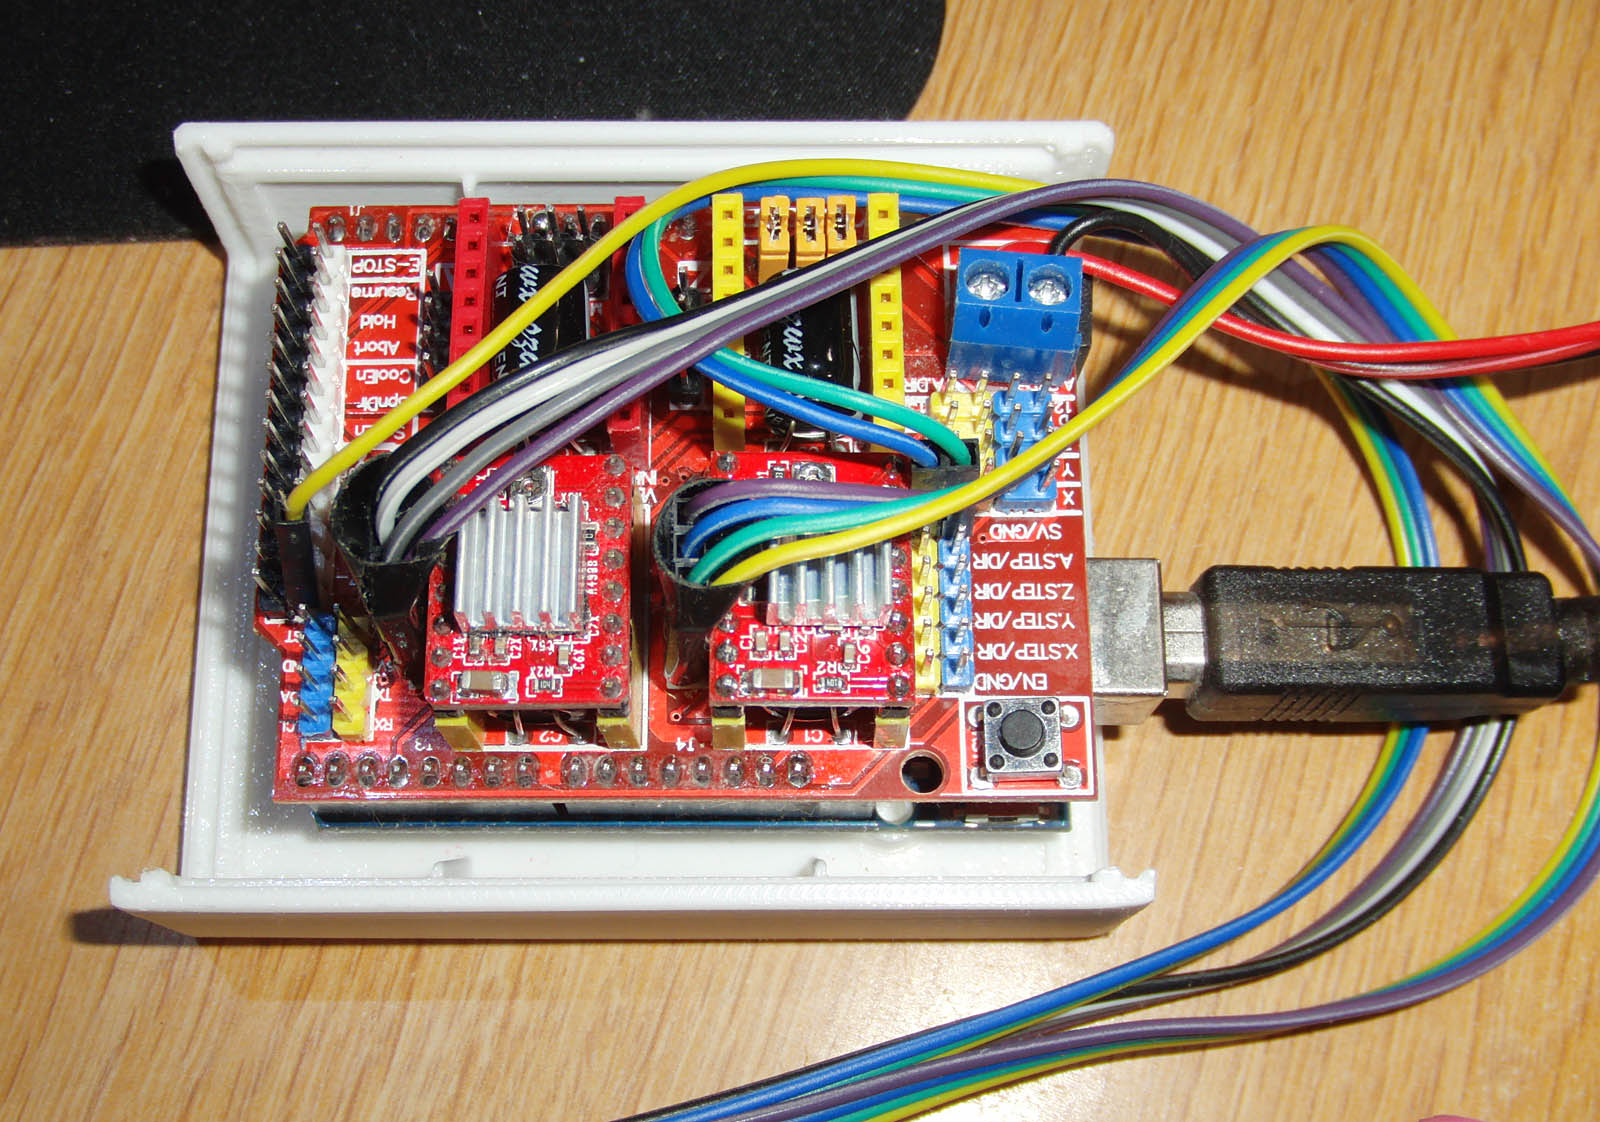
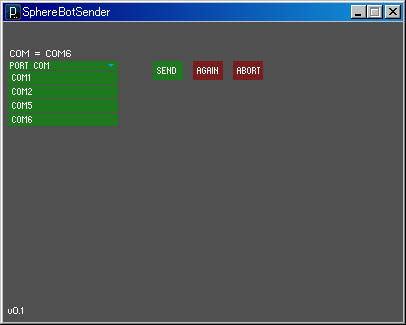
ҚЎүсӮНҒAғyғ“ғAҒ[ғҖӮМҸёҚ~ӮЙҠщ’иӮМғoғlҒiғtғBғүғҒғ“ғgӮрSҺҡҢ`ӮЙғvғҠғ“ғgӮөӮҪӮаӮМҒjӮр—ҳ—pӮ№ӮёҒAҒuServoҒvӮЙ•ү’SӮӘӮ©Ӯ©ӮзӮИӮўӮжӮӨҒAҺқӮҝҸгӮ°ӮйӮҫӮҜӮМҚ\‘ўӮЙ•ПҚXӮөӮДӮ ӮиҒAӮ»ӮМӮҪӮЯServoӮМҺжӮи•tӮҜӮӘҸгүәӢtӮЙӮИӮйҒB
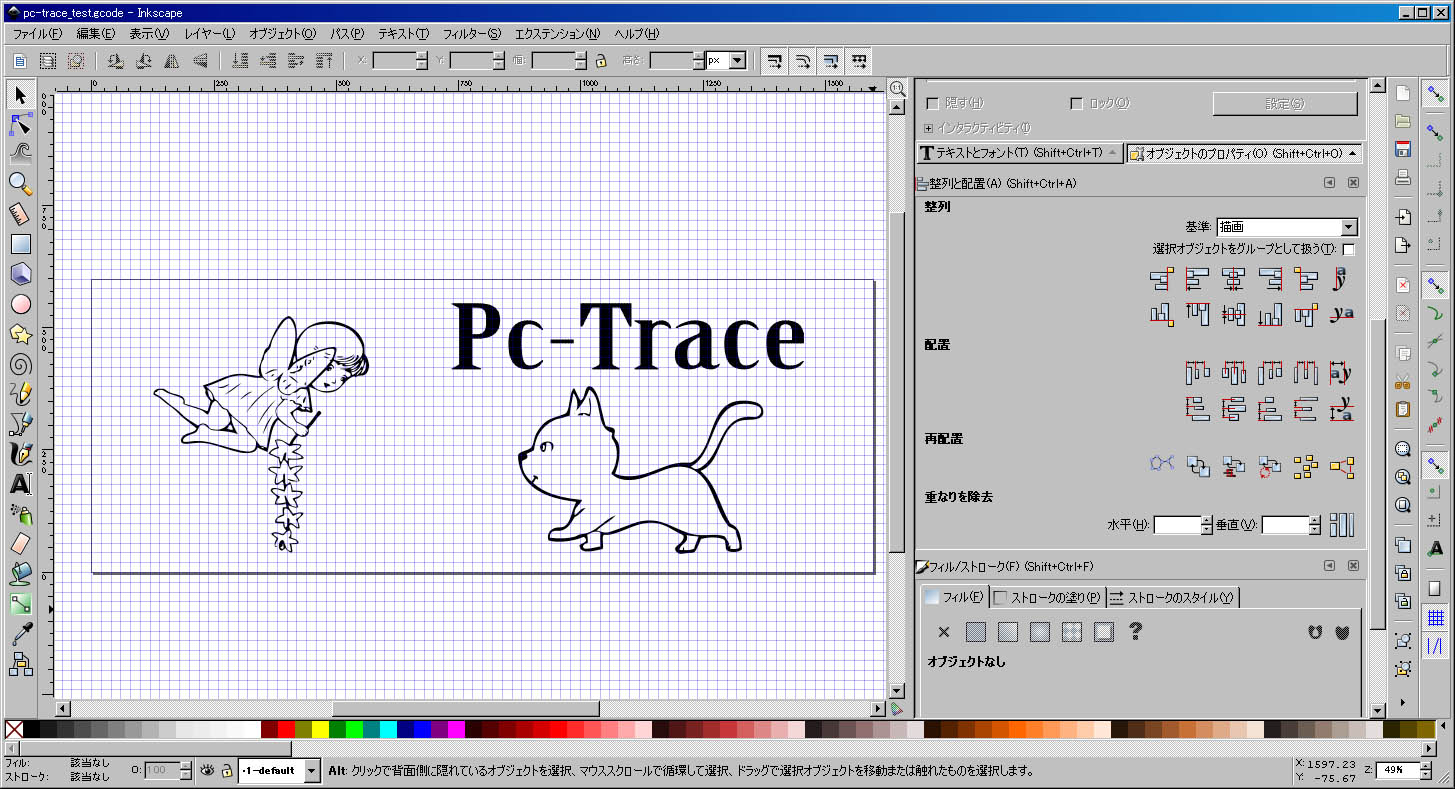
җ»ҚмӮөӮҪғnҒ[ғhӮМҠВӢ«ӮЙҚҮӮнӮ№ӮДҒAҒuInkscapeҒvӮМҒucontext.pyҒvӮрҲИүәӮМӮжӮӨӮЙҸ‘Ӯ«Ҡ·ӮҰӮД—ҳ—pӮөӮҪӮӘҒAӮ ӮӯӮЬӮЕҢВҗlӮМҠВӢ«ӮЙҚҮӮнӮ№ӮД•ПҚXӮөӮҪӮаӮМӮИӮМӮЕҒAӢK’иӮМғ\Ғ[ғXӮрӮ»ӮМӮЬӮЬ—ҳ—pӮ·ӮйҺ–ӮӘ–]ӮЬӮөӮўҒB
ҒiҒҰғyғ“ҢрҠ·ҺһӮЙғAҒ[ғҖӮӘ“®Ӯ©ӮИӮўӮжӮӨҒAҸнӮЙҗ§“®ӮМҢшӮўӮҪҸу‘ФӮЕ’вҺ~Ӯ·ӮйҒBҒj
“Y•tӮөӮҪғ\Ғ[ғXӮМғӢҒ[ғgҒiXPӮМҸкҚҮҒj
C:\Program Files\Inkscape\share\extensions\unicorn
–YӮкӮӘӮҝӮИӮМӮӘҒAғ\Ғ[ғXҸ‘Ӯ«Ҡ·ӮҰҢгӮЙҒA‘OӮЙғRғ“ғpғCғӢӮіӮкӮДӮўӮҪ“Ҝ–јӮМҒupycҒvғtғ@ғCғӢӮрҚнҸңӮөӮДҒuInkscapeҒvӮрҚДӢN“®ӮөӮИӮҜӮкӮОҚXҗVӮөӮҪғ\Ғ[ғXӮМ“а—eӮӘ”ҪүfӮіӮкӮИӮўҺ–ҒB
Ҹ‘Ӯ«Ҡ·ӮҰӮҪғ\Ғ[ғXҒipyҒjӮМғRғ“ғpғCғӢҒEғtғ@ғCғӢҒipycҒjӮНҒAӢN“®ҺһӮЙ‘¶ҚЭӮөӮИӮҜӮкӮОҺ©“®ӮЕҗ¶җ¬ӮіӮкӮйҒB
Ғucontext.pyҒv
----------------------------------------------------------------from math import *
import sys
class GCodeContext:
def __init__(self, xy_feedrate, z_feedrate, start_delay, stop_delay, pen_up_angle, pen_down_angle, z_height, finished_height, x_home, y_home, register_pen, num_pages, continuous, file):
self.xy_feedrate = xy_feedrate
self.z_feedrate = z_feedrate
self.start_delay = start_delay
self.stop_delay = stop_delay
self.pen_up_angle = pen_up_angle
self.pen_down_angle = pen_down_angle
self.z_height = z_height
self.finished_height = finished_height
self.x_home = x_home
self.y_home = y_home
self.register_pen = register_pen
self.num_pages = num_pages
self.continuous = continuous
self.file = file
self.drawing = False
self.last = None
self.preamble = [
"(Scribbled version of %s @ %.2f)" % (self.file, self.xy_feedrate),
"( %s )" % " ".join(sys.argv),
"G21 (metric ftw)",
"G90 (absolute mode)",
"G92 X%.2f Y%.2f Z%.2f (you are here)" % (self.x_home, self.y_home, self.z_height),
""
]
self.postscript = [
"",
"(end of print job)",
"M300 S%0.2F (pen up)" % self.pen_up_angle,
"G4 P%d (wait %dms)" % (self.stop_delay, self.stop_delay),
"M300 S255 (turn off servo)",
"G1 X0 Y0 F%0.2F" % self.xy_feedrate,
"G1 Z%0.2F F%0.2F (go up to finished level)" % (self.finished_height, self.z_feedrate),
"G1 X%0.2F Y%0.2F F%0.2F (go home)" % (self.x_home, self.y_home, self.xy_feedrate),
"M300 S%0.2F (pen up)" % self.pen_up_angle,
"G4 P%d (wait %dms)" % (self.stop_delay, self.stop_delay),
" (M18 drives off)",
]
self.registration = [
"M300 S%d (pen down)" % (self.pen_down_angle),
"G4 P%d (wait %dms)" % (self.start_delay, self.start_delay),
"M300 S%d (pen up)" % (self.pen_up_angle),
"G4 P%d (wait %dms)" % (self.stop_delay, self.stop_delay),
"M18 (disengage drives)",
"M01 (Was registration test successful?)",
"M17 (engage drives if YES, and continue)",
""
]
self.sheet_header = [
"(start of sheet header)",
"G92 X%.2f Y%.2f Z%.2f (you are here)" % (self.x_home, self.y_home, self.z_height),
]
if self.register_pen == 'true':
self.sheet_header.extend(self.registration)
self.sheet_header.append("(end of sheet header)")
self.sheet_footer = [
"(Start of sheet footer.)",
"M300 S%d (pen up)" % (self.pen_up_angle),
"G4 P%d (wait %dms)" % (self.stop_delay, self.stop_delay),
"G91 (relative mode)",
"G0 Z15 F%0.2f" % (self.z_feedrate),
"G90 (absolute mode)",
"G0 X%0.2f Y%0.2f F%0.2f" % (self.x_home, self.y_home, self.xy_feedrate),
"M01 (Have you retrieved the print?)",
"(machine halts until 'okay')",
"G4 P%d (wait %dms)" % (self.start_delay, self.start_delay),
"G91 (relative mode)",
"G0 Z-15 F%0.2f (return to start position of current sheet)" % (self.z_feedrate),
"G0 Z-0.01 F%0.2f (move down one sheet)" % (self.z_feedrate),
"G90 (absolute mode)",
"M18 (disengage drives)",
"(End of sheet footer)",
]
self.loop_forever = [ "M30 (Plot again?)" ]
self.codes = []
def generate(self):
if self.continuous == 'true':
self.num_pages = 1
codesets = [self.preamble]
if (self.continuous == 'true' or self.num_pages > 1):
codesets.append(self.sheet_header)
elif self.register_pen == 'true':
codesets.append(self.registration)
codesets.append(self.codes)
if (self.continuous == 'true' or self.num_pages > 1):
codesets.append(self.sheet_footer)
if self.continuous == 'true':
codesets.append(self.loop_forever)
for codeset in codesets:
for line in codeset:
print line
else:
for p in range(0,self.num_pages):
for codeset in codesets:
for line in codeset:
print line
for line in self.postscript:
print line
def start(self):
self.codes.append("M300 S%0.2F (pen down)" % self.pen_down_angle)
self.codes.append("G4 P%d (wait %dms)" % (self.start_delay, self.start_delay))
self.drawing = True
def stop(self):
self.codes.append("M300 S%0.2F (pen up)" % self.pen_up_angle)
self.codes.append("G4 P%d (wait %dms)" % (self.stop_delay, self.stop_delay))
self.drawing = False
def go_to_point(self, x, y, stop=False):
if self.last == (x,y):
return
if stop:
return
else:
if self.drawing:
self.codes.append("M300 S%0.2F (pen up)" % self.pen_up_angle)
self.codes.append("G4 P%d (wait %dms)" % (self.stop_delay, self.stop_delay))
self.drawing = False
self.codes.append("G1 X%.2f Y%.2f F%.2f" % (x,y, self.xy_feedrate))
self.last = (x,y)
def draw_to_point(self, x, y, stop=False):
if self.last == (x,y):
return
if stop:
return
else:
if self.drawing == False:
self.codes.append("M300 S%0.2F (pen down)" % self.pen_up_angle)
self.codes.append("G4 P%d (wait %dms)" % (self.start_delay, self.start_delay))
self.drawing = True
self.codes.append("G1 X%0.2f Y%0.2f F%0.2f" % (x,y, self.xy_feedrate))
self.last = (x,y)

“Y•tғtғ@ғCғӢ