SketchUpӮЖҸҹҺиӮМҲбӮӨҒuUnityҒvӮЙҲ«җнӢꓬҒB
•ЁҲкӮВӮЬӮЖӮаӮЙ“®Ӯ©Ӯ№ӮИӮўҢ»ҸуӮЙҒAҢцҺ®ғTғCғgӮМғ}ғjғ…ғAғӢӮр’ҡ”JӮЙ“ЗӮЭӮұӮсӮЕ‘МҚЩӮрҺжӮзӮёҠөӮкӮйҺ–ӮЙӮөӮҪҒB
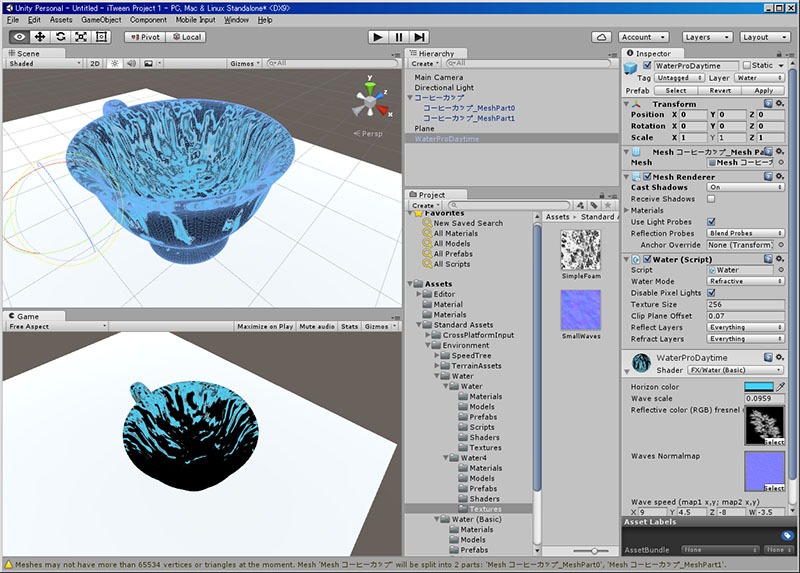
ғ}ғjғ…ғAғӢӮЙҸKӮБӮДҒAҺАҚЫӮЙғXғNғҠғvғgӮрҸ‘ӮўӮДҠөӮкӮй—јҺжӮиҚмҗнҒB
ӮұӮкӮЩӮЗҠИ’PӮИғXғNғҠғvғgӮЕӮағGғүҒ[‘ұҸoӮЕғwғgғwғgӮЙӮИӮБӮДӮөӮЬӮӨҒB
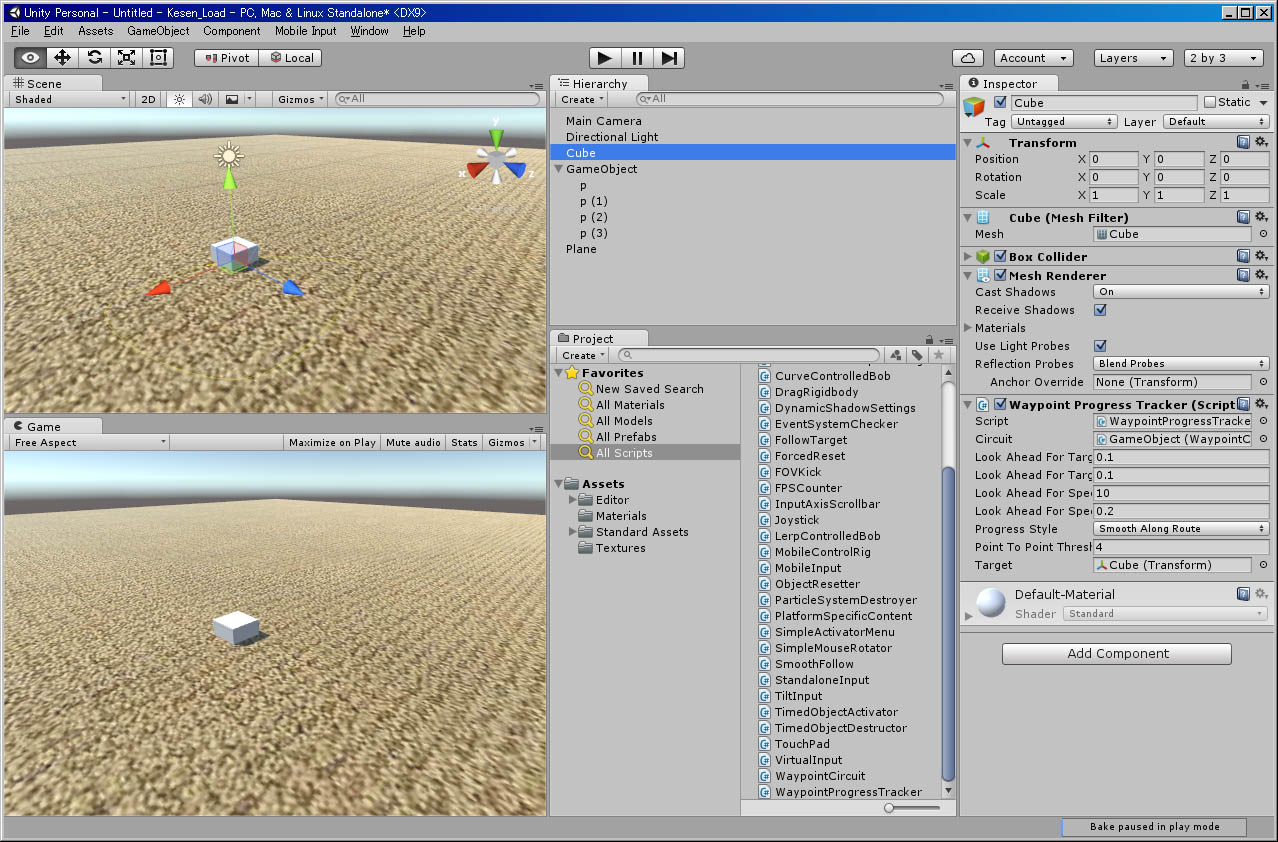
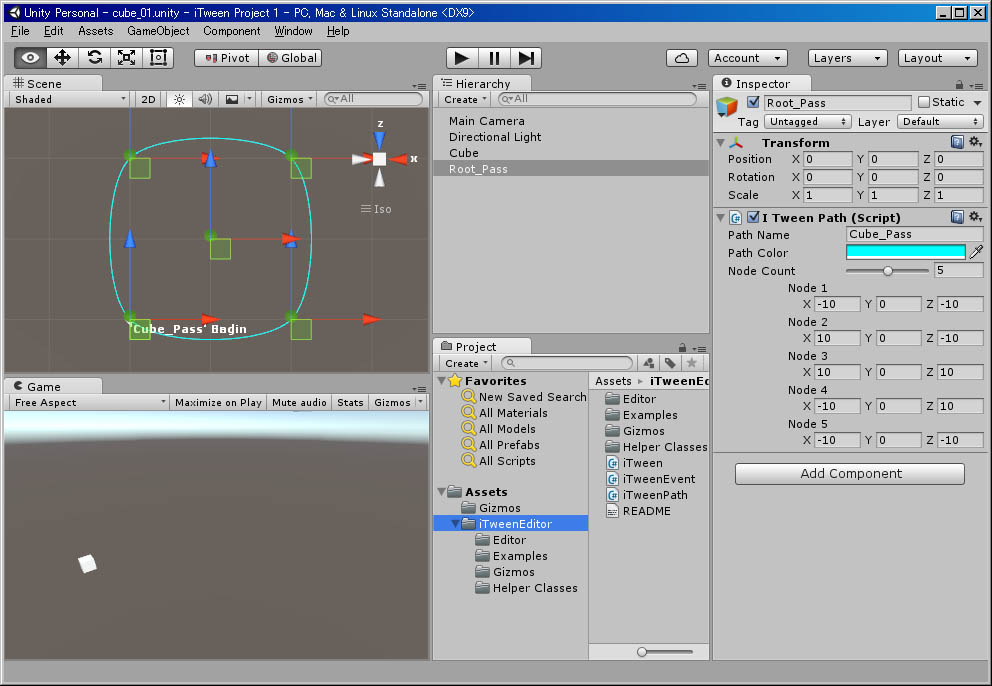
ҒЎҗжӮёӮНғ{ғ^ғ“Ӯр”z’uӮө“®Ӯ©Ӯ·ӮұӮЖӮ©ӮзҒBҒiҲЪ“®ӮМӮЭӮМғXғNғҠғvғg“Y•tҒj
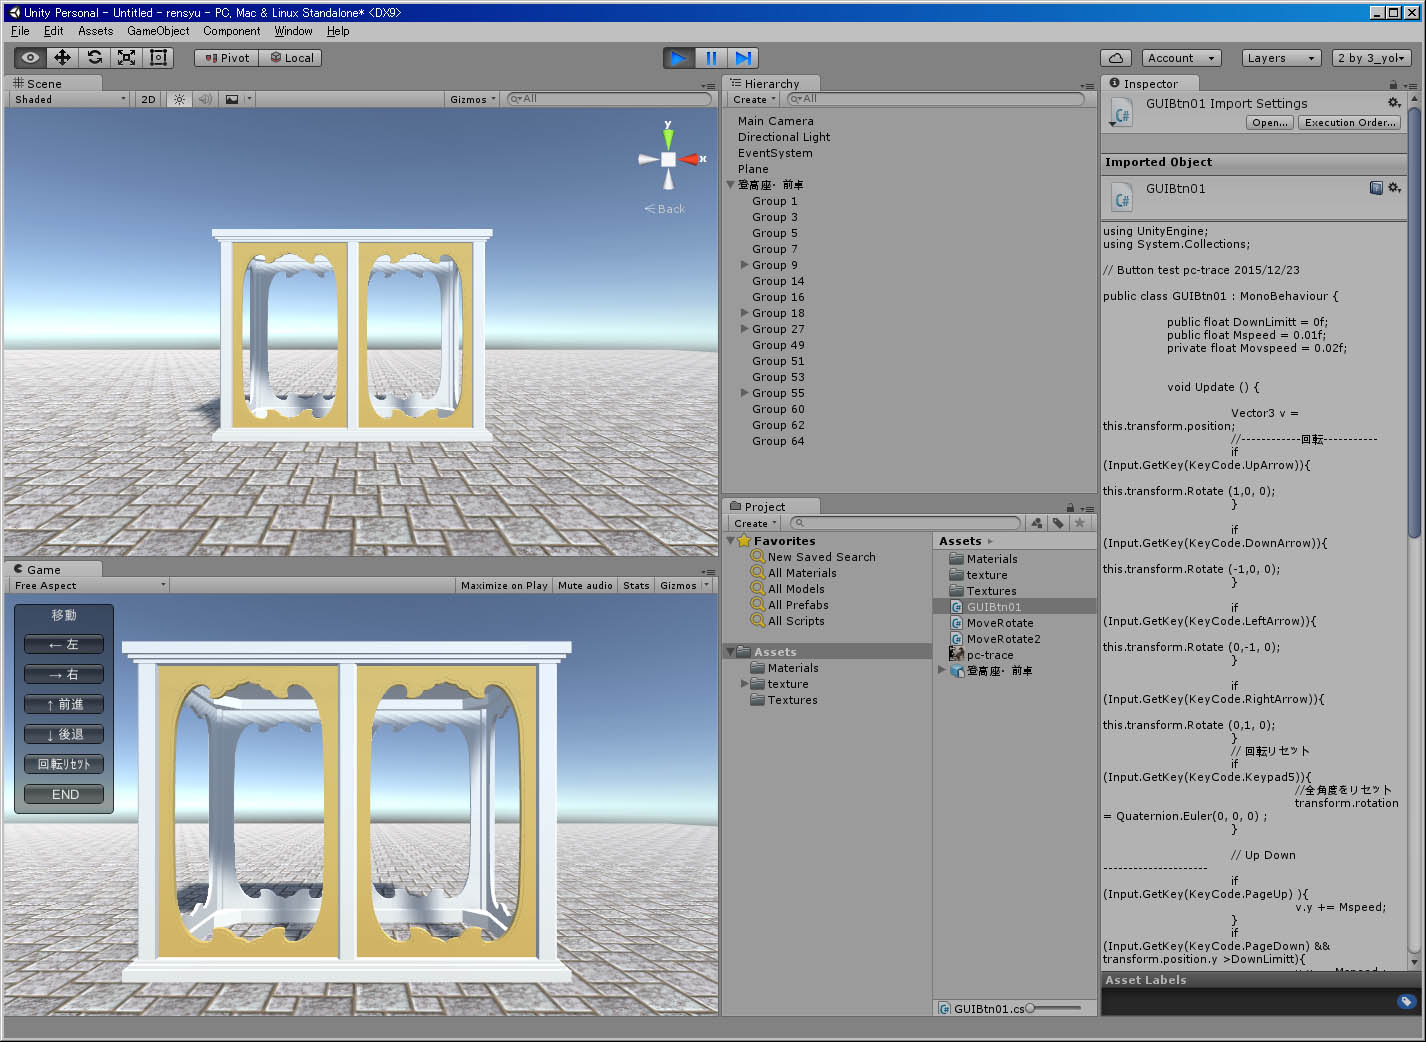
ҒЎҲЪ“®Ӯрғ{ғ^ғ“‘ҖҚмӮЕҚsӮўҒA—қүрӮ·ӮйӮҪӮЯӮМҒ@C#Ғ@—ыҸKғXғNғҠғvғgҒB“Y•tғtғ@ғCғӢӮМ—ыҸKғXғNғҠғvғgӮЖҲбӮўҒAүс“]ӮрҠЬӮЮҒB
ҒңҒ@Unity 5.2.3f1 (32-bit)
using UnityEngine;
using System.Collections;
// Button test pc-trace 2015/12/23
public class GUIBtn01 : MonoBehaviour {
public float DownLimitt = 0f;
public float Mspeed = 0.01f;
private float Movspeed = 0.02f;
void Update () {
Vector3 v = this.transform.position;
//------------үс“]-----------
if (Input.GetKey(KeyCode.UpArrow)){
this.transform.Rotate (1,0, 0);
}
if (Input.GetKey(KeyCode.DownArrow)){
this.transform.Rotate (-1,0, 0);
}
if (Input.GetKey(KeyCode.LeftArrow)){
this.transform.Rotate (0,-1, 0);
}
if (Input.GetKey(KeyCode.RightArrow)){
this.transform.Rotate (0,1, 0);
}
// үс“]ғҠғZғbғg
if (Input.GetKey(KeyCode.Keypad5)){
//‘SҠp“xӮрғҠғZғbғg
transform.rotation = Quaternion.Euler(0, 0, 0) ;
}
// ҸгҸёҒAүәҚ~ ---------------------
if (Input.GetKey(KeyCode.PageUp) ){
v.y += Mspeed;
}
if (Input.GetKey(KeyCode.PageDown) && transform.position.y >DownLimitt){
v.y -= Mspeed ;
}
this.transform.position = v;
}
// --------ғ{ғ^ғ“ӮрҺgӮБӮҪ‘OҢгҚ¶үEӮМҲЪ“®-------------
void OnGUI () {
// Make a background box
GUI.Box(new Rect(10,10,100,210), "ҲЪ“®");
// Make the first button. If it is pressed, Application.Loadlevel (1) will be executed
if(GUI.RepeatButton(new Rect(20,40,80,20), "Ғ© Қ¶")) {
transform.position -= new Vector3(Movspeed, 0f, 0f);
}
if(GUI.RepeatButton(new Rect(20,70,80,20), "ҒЁ үE")) {
transform.position += new Vector3(Movspeed, 0f, 0f);
}
if(GUI.RepeatButton(new Rect(20,100,80,20), "ҒӘ ‘Oҗi")) {
transform.position += new Vector3(0f, 0f,Movspeed);
}
if(GUI.RepeatButton(new Rect(20,130,80,20), "Ғ« Ңг‘Ю")) {
transform.position -= new Vector3(0f, 0f,Movspeed);
}
//-----------үс“]ғҠғZғbғg--------------------------
if(GUI.RepeatButton(new Rect(20,160,80,20), "үс“]ғҠғZғbғg")) {
transform.rotation = Quaternion.Euler(0, 0, 0) ;
}
// Ғ@ҸI—№
if(GUI.Button(new Rect(20,190,80,20), "END")) {
Application.Quit();
}
}
}
//----------------end------------------
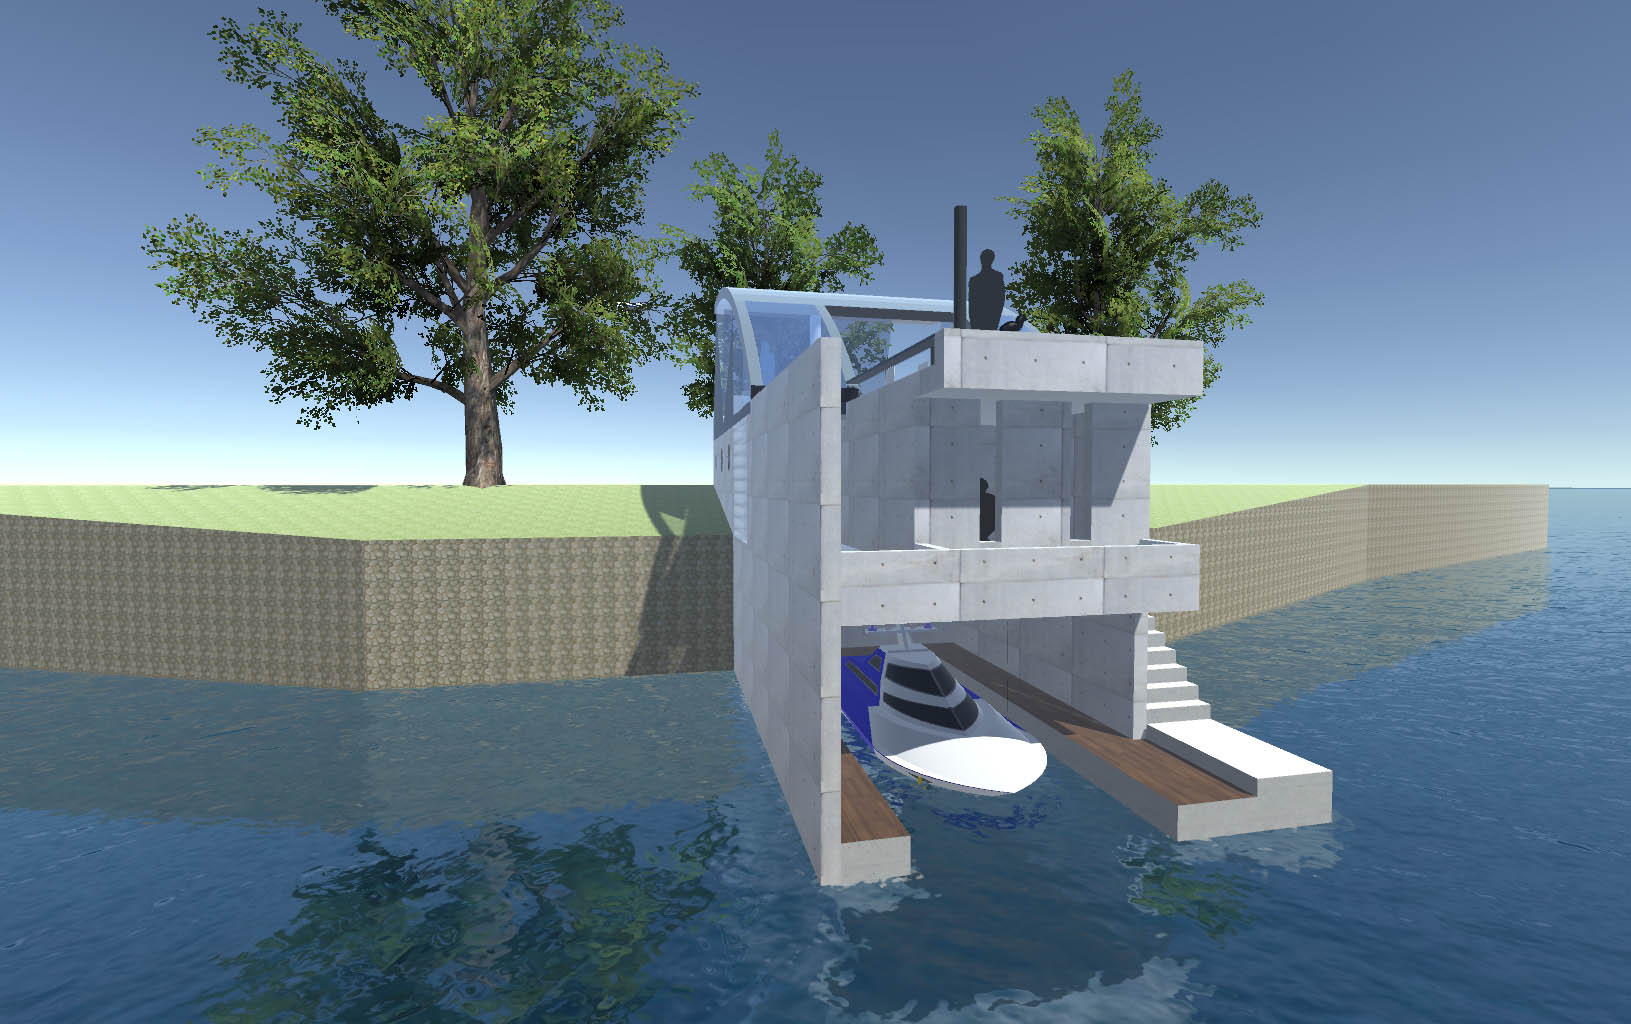
ҒЎӮЖӮЙӮ©ӮӯғJғҒғүӮЕғӮғfғӢӮрҢ©“nӮөӮҪӮўғXғNғҠғvғgҒB
ӮаӮӨҒAғ\Ғ[ғXӮМүҳӮіӮӘ–һҠJӮЕӮ ӮйҒB
Unity 5.2.3f1 (32-bit)Ғ@ғLҒ[ғ{Ғ[ғhӮЖғ}ғEғXҢ“—pҒB
ҒҰғXғNғҠғvғgҺg—pӮЙӮжӮйҲкҗШӮМғTғ|Ғ[ғgӮЖҒA•ЫҸШӮНӮ ӮиӮЬӮ№ӮсҒB
using UnityEngine;
using System.Collections;
public class MoveRotate2 : MonoBehaviour
{
public float cameraSensitivity = 90;
public float climbSpeed = 4;
public float normalMoveSpeed = 10;
public float slowMoveFactor = 0.25f;
public float fastMoveFactor = 3;
private float rotationX = 0.0f;
private float rotationY = 0.0f;
void Start ()
{
// Cursor.lockState = CursorLockMode.Confined;
Cursor.lockState = CursorLockMode.Confined;
Cursor.visible = false; //OSғJҒ[ғ\ғӢ”с•\ҺҰ
}
void Update ()
{
rotationX += Input.GetAxis("Mouse X") * cameraSensitivity * Time.deltaTime;
rotationY += Input.GetAxis("Mouse Y") * cameraSensitivity * Time.deltaTime;
rotationX += Input.GetAxis ("Horizontal") * cameraSensitivity * Time.deltaTime;
rotationY += Input.GetAxis ("Vertical") * cameraSensitivity * Time.deltaTime;
rotationY = Mathf.Clamp (rotationY, -90, 90);
transform.localRotation = Quaternion.AngleAxis(rotationX, Vector3.up);
transform.localRotation *= Quaternion.AngleAxis(rotationY, Vector3.left);
if (Input.GetKey (KeyCode.LeftShift) || Input.GetKey (KeyCode.RightShift))
{
//transform.position += transform.forward * (normalMoveSpeed * fastMoveFactor) * Input.GetAxis("Vertical") * Time.deltaTime;
// transform.position += transform.right * (normalMoveSpeed * fastMoveFactor) * Input.GetAxis("Horizontal") * Time.deltaTime;
if (Input.GetKey (KeyCode.Keypad2)) {
transform.position -= transform.forward * (normalMoveSpeed * fastMoveFactor) * Time.deltaTime;
}
if (Input.GetKey (KeyCode.Keypad8)) {
transform.position += transform.forward * (normalMoveSpeed * fastMoveFactor) * Time.deltaTime;
}
if (Input.GetKey (KeyCode.Keypad4)) {
transform.position -= transform.right * (normalMoveSpeed * fastMoveFactor) * Time.deltaTime;
}
if (Input.GetKey (KeyCode.Keypad6)) {
transform.position += transform.right * (normalMoveSpeed * fastMoveFactor) * Time.deltaTime;
}
}
else if (Input.GetKey (KeyCode.LeftControl) || Input.GetKey (KeyCode.RightControl))
{
//transform.position += transform.forward * (normalMoveSpeed * slowMoveFactor) * Input.GetAxis("Vertical") * Time.deltaTime;
//transform.position += transform.right * (normalMoveSpeed * slowMoveFactor) * Input.GetAxis("Horizontal") * Time.deltaTime;
if (Input.GetKey (KeyCode.Keypad2)) {
transform.position -= transform.forward * (normalMoveSpeed * slowMoveFactor) * Time.deltaTime;
}
if (Input.GetKey (KeyCode.Keypad8)) {
transform.position += transform.forward * (normalMoveSpeed * slowMoveFactor) * Time.deltaTime;
}
if (Input.GetKey (KeyCode.Keypad4)) {
transform.position -= transform.right * (normalMoveSpeed * slowMoveFactor) * Time.deltaTime;
}
if (Input.GetKey (KeyCode.Keypad6)) {
transform.position += transform.right * (normalMoveSpeed * slowMoveFactor) * Time.deltaTime;
}
}
else
{
// transform.position += transform.forward * normalMoveSpeed * Input.GetAxis("Vertical") * Time.deltaTime;
// transform.position += transform.right * normalMoveSpeed * Input.GetAxis("Horizontal") * Time.deltaTime;
if (Input.GetKey (KeyCode.Keypad2)) {
transform.position -= transform.forward * normalMoveSpeed * Time.deltaTime;
}
if (Input.GetKey (KeyCode.Keypad8)) {
transform.position += transform.forward * normalMoveSpeed * Time.deltaTime;
}
if (Input.GetKey (KeyCode.Keypad4)) {
transform.position -= transform.right * normalMoveSpeed * Time.deltaTime;
}
if (Input.GetKey (KeyCode.Keypad6)) {
transform.position += transform.right * normalMoveSpeed * Time.deltaTime;
}
}
//--------------------------------------------------------------
if (Input.GetMouseButton(0)) {
transform.position += transform.forward * normalMoveSpeed * Time.deltaTime;
}
if (Input.GetMouseButton(1)) {
transform.position -= transform.forward * normalMoveSpeed * Time.deltaTime;
}
if (Input.GetKey (KeyCode.Keypad8)) {
transform.position += transform.forward * normalMoveSpeed * Time.deltaTime;
}
if (Input.GetKey (KeyCode.Keypad2)) {
transform.position -= transform.forward * normalMoveSpeed * Time.deltaTime;
}
if (Input.GetKey (KeyCode.Keypad4)) {
transform.position -= transform.right * normalMoveSpeed * Time.deltaTime;
}
if (Input.GetKey (KeyCode.Keypad6)) {
transform.position += transform.right * normalMoveSpeed * Time.deltaTime;
}
//--------------------------------------------------------------
if (Input.GetKey (KeyCode.PageUp)) {transform.position += transform.up * climbSpeed * Time.deltaTime;}
if (Input.GetKey (KeyCode.PageDown)) {transform.position -= transform.up * climbSpeed * Time.deltaTime;}
if (Input.GetKey(KeyCode.Escape)) {
Application.Quit();
}
}
}

“Y•tғtғ@ғCғӢ